Wednesday, October 03, 2012

Apple Spice Cake


I have been meaning to post this recipe for quite some time now but the photos I took aren't great. At the time the camera was running out of batteries, and I couldn't get my lighting right, so all my shots were blurry and dark. The ones I have here are the best that I managed to get and, believe me, they do not do this cake justice. I keep making this cake to take places, but then by the time it is finished I have to leave, and if there are any leftovers they do not last long enough for me to photograph....and I take almost all of the blame for that. Why don't I just bake a cake for myself and take photos? Because I can't put that kind of temptation in front of me! This is the kind of cake that I will eat for every meal until it is gone. What is wrong with me? Or rather, what is so right about this cake?

I recently took this cake to a summer BBQ where one of my friends said he could eat it all day. Even more recent, I took it to a party at another friend's house. My friend is Italian, and this party was full of her Italian family and other Italian friends. I figured it would be a tough crowd to convince that my gluten-free-vegan cake was actually good and they should try it out. But I didn't have to convince them at all. I have never, ever, received such wonderful and plentiful compliments for my cooking, and it made me blush.

The flavour of this cake is reminiscent of carrot cake, which I think is why it pairs so nicely with my Vegan Buttercream, which slightly resembles cream cheese icing. On the other hand, my husband is not a fan of carrot cake and yet loves this cake. It is an excellent cake for this time of year when you want to take advantage of apple season, but are looking for something different than a pie or a crisp.

It is Canadian Thanksgiving this weekend and I am going to make this cake for one, or more, of my celebrations. Perhaps then I can get a better photo. (That is, if there is time before it is all gobbled up!) I hope you can wow some of your family and friends with this cake. I promise you, not many people can tell that it is either gluten-free, or vegan. Maybe don't even tell them...


Apple Spice Cake

2 1/2  cups sorghum flour
1 1/2 cups brown rice flour
4 tbsps tapioca flour/starch
4 tsps baking soda
2 tsps cinnamon
1 tsp nutmeg
1/2 tsp allspice
1 tsp fine sea salt
1 tsp xantham gum

3 1/2 cups apple sauce
1 3/4 cups dark brown sugar
1/2 cup sunflower oil, or other light tasting oil

Preheat oven to 325° F / 167° C. Grease two 9" / 23 cm round cake pans, if your pans generally stick a little, you may want to line them with parchment paper as well.

In a medium bowl mix wet ingredients (including brown sugar), set aside. In a large bowl sift dry ingredients together. Add wet to dry and stir just until combined. Divide batter into pans, and bake on second-from-top rack for 38-45 minutes or until a cake tester or toothpick comes out clean. Let cool in in pans on a rack for about 15-20 minutes, then remove from pans and cool completely before icing.

Ice cake with my Vegan Buttercream icing and dust with ground cinnamon.

This can also be made into cupcakes, it will yield about 24. Bake at the same temperature for 20-25 minutes. I have not made these cupcakes in a while, so please keep an eye on them in case they end up cooking quicker than I have noted.

Please Note: This cake is gluten-free, free of all top allergens, and vegan. If you are baking for a vegan, check to see if they eat refined sugar because many do not, do to how it is processed. You can always look on packaging to see if something is certified vegan, or contact the company. I, personally, am not vegan, but am allergic to eggs (and until recently, dairy) which is why all of my baking is vegan, or close to it.


*Please Note* These recipes are part of my personal allergy diet. Please remember that everyone's allergies are different.  If you are unsure about any ingredients listed in these recipes please check with your doctor before introducing.

Tuesday, August 21, 2012

Rapini with Garlic Scapes


Rapini with garlic scapes and cloves of garlic


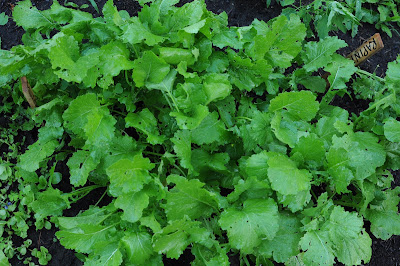
In keeping with my garden theme, I've decided to post a recipe using my fresh garden rapini. Rapini, also known as broccoli raab, is part of the brassicaceae, or mustard family. It has a delicate broccoli flavour, with small florettes, and leaves that are similar to kale. The entire plant is edible, including its flowers.

Rapini is a cool-weather crop. This means that when temperatures get very hot, it will bolt and produce tall, skinny stems and flower quickly - this is the plant getting ready to produce seeds. Once the rapini flowers bloom, the plant becomes bitter and tough. You can still eat it, but it will need to be cooked in salted water for a longer period of time than usual. This summer has been hot, and I was lucky enough to get my rapini planted in the spring, before the weather got too hot. Because of this, it grew into quite a substantial crop and I got a nice harvest out of it. However, because of the high heat over the past month or so, it has started to bolt. 

My garden rapini, in the early summer


If you find your rapini bolting, trim the skinny, flowered stems. When the temperatures become hot, check your rapini every day for flowering buds, they produce very quickly. If you notice any buds that begin to flower, pinch them off.  Don't throw them away! You can add these raw buds, as well as the bolting stems, to salads, if tender enough.

Harvest rapini when it forms buds, but before they flower. You can cut the leaves at any time. I read on Canadian Gardening that each leaf node (where the leaves grow out of the stem ) will produce another bud. To harvest your plants while still leaving enough of the plant to grow into a second crop, cut stems approximately10-15 centimeters (about 4-6 inches) above the bottom, coarse leaves.

I was lucky enough to harvest my rapini while it was still young and very tender. I was actually able to eat a raw leaf, and it was delicious - not bitter at all! If you ever have the chance to grow rapini, or purchase fresh rapini at a farmer's market, jump on it. Freshness makes all the difference when it comes to rapini.

Garlic scapes are the tips of the garlic plant. They grow into curly, green stems and have a mild garlic taste. You will probably be able to find these at your farmer's market when in season. I keep reading that they are usually in season in early spring, but I was able to find some well into the summer. If you do not have garlic scapes available, you may simply make this recipe with cloves of garlic and it will still taste delicious.


Rapini with garlic scapes and cloves of garlic


Rapini with Garlic Scapes

One bunch of rapini (about two or three good handfulls)
3-4 garlic scapes
3 cloves of garlic (omit if you only want the mild garlic flavour from the garlic scapes)
Olive oil, or oil of your choice
Salt and pepper

If your rapini is not fresh from the garden, or it is bitter, or tough, I suggest coking it in boiling, salted water for at about one minute, or until tender. Drain, and set aside. You can test to see if your rapini is fresh and tender enough by eating a piece of it raw. If you can do this successfully and you enjoy its raw flavour then you do not need to pre-cook it in water and you will simply saute it in the pan. (see directions below)

Roughly chop garlic. Add garlic and a generous amount of oil to a frying pan, preheated on medium/medium-high heat.  Saute until lightly golden. Roughly chop garlic scapes - I prefer pieces about 2.5 cms, approximately 1 inch.  

If the rapini has already been cooked in water: add garlic scapes and saute about one minute. Add rapini, salt, and pepper to your pan. Sautee about another minute.  

If you are adding raw rapini to your pan: add garlic scapes, rapini, salt, and pepper and saute until the thickest pieces of rapini are fork-tender.

Serves about four people as a side-dish

Note: If you have leftovers, they are delicious, even cold! One of my friends is Italian, and her mom makes her sandwiches of leftover rapini. So very delicious!

Saturday, July 21, 2012

My Garden, and Sheena Cucina Anniversary!


Here I am with my sunflowers in last year's garden. They grew to over twelve feet tall! 

Okay, I'm not even going to talk about how long it has been since I last posted a recipe. In my defence, I have not been cooking that much due to the heat. I have also been socializing when I feel well, actually going out in public to restaurants, bars, parties! (Oh my!) My life looks a lot different than it did a few months ago. I could get used to this!

Today is a special day for me, it is the anniversary of my first post for Sheena Cucina! To celebrate, I am going to try to get my butt in gear and start posting more recipes! Speaking of my life looking different...the difference between my life a year ago, and my life today is astonishing. If this is the kind of progress my health has made in a year, I can't even imagine what it will look like in the years to come.

Something that has changed for me a lot since developing allergies is my view of food and the food industry. I do not eat anything artificial; no preservatives, additives, or colouring. I try to eat as many vegetables as possible, and try to make as many of them local and organic as I can afford. I am a huge fan of the back-yard food movement, and over the past couple of years have developed quite a large vegetable garden. The idea of being self-sufficient and providing my own food is extremely appealing to me. I have learned that food is medicine, plain and simply. So I try to grow as much of it myself.

Golden Detroit Beets

In keeping with a local mindset, I purchase most of my seeds from an Ontario seed company called The Cottage Gardener. They have a wonderful variety of heirloom seeds to choose from, and I have had great success with these seeds. I can (and have) spent hours looking over their catalogue. Check them out, or try to find a local seed distributor in your area.

I started out small, and over the past few years I have increased the size of my garden. This year I am going to preserve some food for the winter by canning and freezing. I am also going to try to put some of my produce like squash, beets, and radishes into cold-storage in our basement.

Some of my veggies are a little late this year, I wasn't feeling great at the beginning of the summer so I couldn't get them in the ground as early as usual.  However, this year for the first time I am planting a second crop of some quickly-growing and cold-hearty veggies! In this crop there will be things like beets, carrots, parsnips, radishes and Swiss chard. What do you have growing in your garden this year?


Ronde de Nice Summer Squash
In my garden this year:

Arugula
Beets: Golden Detroit, Chioggia, Bull's Blood, Cylindra
Beans: Contender Snap Bean
Carrots: Yellow, Purple, Red, White
Cucumber: Double Yield Cucumber
Fennel: Florence Fennel "Zefa Fino"
Kale: Black Tuscan Palm Tree, Russian Red, True Siberian
Lettuce: Buttercrunch
Onions: Green
Parsnips: Harris Model Parsnip
Peas: Mammoth Melting Sugar Pea
Pumpkin: Small Sugar Pumpkin
Purslane: Golden
Radishes: Black Spanish Round Radish, Cherry Belle, French Breakfast, Plum Purple, Ruby Red, White Icicle
Rapini
Summer Squash: Black Beauty Summer Squash, Yellow Crookneck, Ronde De Nice Zucchini, Benning's Green Tint Bush Squash (a patty pan)
Sunflowers
Spinach: Bloomsdale, New Zealand, Strawberry Spinach
Strawberries
Winged Pea/Asparagus Pea (not actually related to peas or asparagus)
Winter Squash: Buttercup, Waltham Butternut, Golden Hubbard

Herbs:
Chives
Coriander/Cilantro
Dill
Mint: Peppermint, Mojito
Oregano
Rosemary
Sage
Savoury
Thyme


Golden Purslane. Many consider it a weed, but it is delicious as a salad green!

Monday, May 28, 2012

My BIE Story

I have thought about this post more than any other. I have re-written passages in my head about fifty times, and have sat down to write it more times that I can remember. So, what's my problem? Well...I seem to all of a sudden not have allergies anymore. You'd think that I would be happy to share this news with you, but, as it turns out, this is very difficult to write about.

My allergies have been cleared by BIE. This is so difficult to write about because I don't fully understand the process of BIE. I have been seeing a holistic allergist and undergoing BIE allergy elimination treatments since last August. Faithfully, every two weeks. I have been skeptical this whole time, because I had tried BIE with my naturopath before and it hadn't helped me. With my new allergist I was seeing some improvement, but it was slow. Since I started to see my allergist I have not taken an Epi-Pen (which I had been taking a LOT last year), I had seen an improvement in my migraines, and my mood, and I had been able to re-introduce some foods that had been giving me problems. Not bad, but that's sort of as far as I expected to go.

I was still taking Benadryl frequently, making all of my food myself, staying at home a lot, unable to go to the grocery store or restaurants. But now, all of this has changed!

In my last post I mentioned how my allergist cleared me for wheat and the smell of wheat, and since then I had begun to feel different. I had more energy, my sleeping habits were improving, and overall I felt more like myself again. I actually started to feel like I didn't have allergies any more. I couldn't explain what the feeling was, exactly...just that I was sure that simply being around food would not harm me.

My husband and I went to visit a friend in Toronto who lives in Little Italy, and accidentally took the route that forced us to walk past countless restaurants. I was terrified. I expected to take Benadryl, but I never needed to. During that trip a few things happened that would normally give me a reaction - I was on the subway and people were carrying food close to me, I walked by a restaurant and got a mouth-full of their exhaust air....nothing happened. I felt so positive on the way home that I decided to go to the local grocery store. I smelled food cooking, and something baking, and still, nothing happened. Since then, I have gradually been testing the waters, and am happy to say that I can now go to grocery stores, I can now go to restaurants, and I have even eaten at a few restaurants (although I order very carefully).

I am not crazy. I am not brainwashed. I assure you that this is not a "mind over matter" thing - you cannot simply think your way out of allergies. I don't know how BIE works, but I am telling you it does.

I have read so many allergy message boards where people bash the idea of BIE. They say they will stick with what is recommended by their conventional allergists. Basically it sounds like they are afraid of BIE. The thing that people seem afraid of is that they don't want to re-introduce foods that are potentially life threatening. That is a legitimate fear! Here is what my allergist has told me about that; if I am concerned about a food then wait six months after she has cleared it, and have blood tests and scratch tests done again. If my doctor or I are still uncertain, then I can introduce the food in a safe setting, like an oral challenge.

Something else that people seem concerned about is that if BIE can rid your body of allergies, then why hasn't conventional medicine caught on to it? Why are people all over the place suffering with, and dying from allergies? I don't know. The only reason that know of is that it takes time for things like that to happen. My allergist uses the comparison of acupuncture, or massage therapy - it was not too long ago that conventional doctors sneered at the mention of them, and now they are commonplace.

I realized that I didn't have to be scared of BIE. The actual treatment couldn't hurt me - all I had to lose was money (which is a huge deal for us, but if I could get well enough that I could work again then the money we spent would be worth it).  So I did it. But, it has taken a long time. When I first met my allergist, I asked her if she had ever treated anyone who was allergic to as many things as me. She had, but it took about a year before this person could eat everything. I have heard stories where people just go once and their anaphylactic allergies are gone! This wasn't the case for me, perhaps because I had so many allergies and health issues that were affecting each other. It was like peeling back the layers of my health and fixing them one-by-one.

Aside from the money and time, this process hasn't been easy on me. For about the first four months I felt really crappy after my treatments, and went through "healing crises". This is essentially a detox that your body undergoes, as it is "reprogramming" your cells to not attack your allergens. If you've ever done a detox then you know the feeling that I'm talking about. As my body got used to the process, my healing crises got easier to handle. Now, I maybe feel a little sick for a day or two, but other than that I'm fine. If you are having issues with healing crises, then try to help your body detox faster by; drinking lemon in warm water first thing in the morning, drinking a lot of water throughout the day, having hot epsom salt baths or a sauna, and eating foods that aid your body in detoxification like turmeric, beets, onions, garlic, and anything from the cabbage family.


I have been trying to explain BIE to my family and friends, and keep getting strange looks. This is partially because it sounds ridiculous, and partially because I do not fully understand it and so I'm bad at explaining it. Because of this, I'm not going to try to explain BIE to you. All I can say is that it worked for me, and that is all the proof that I need. It sounds like I'm part of an infomercial - that I'm trying to sell you something. But, I'm just a person with allergies, trying to get better, and I have found that THIS WORKS! I thought I would be spending the rest of my life cooped up, unable to go places and socialize, changing my dreams and plans to revolve around my allergies. I'm telling you, just think about it. What if your allergies and sensitivities don't have to be forever? That one day, you could be allergy-free? It sounds impossible, but what if allergies didn't have to be your life anymore? WHAT IF?

I still have many foods to re-introduce, and I haven't decided if I am going to do some of them on my own, or with a doctor. I do know that I am no longer allergic to many foods that I ingest, and I am no longer allergic to airborne foods. For now, this will do, and I will start to live my life again!

*Please Note* The information on this blog is from my personal experience and is not intended to diagnose or treat. If you have questions about information on this blog, and how it pertains to you, please contact your doctor.

Thursday, April 12, 2012

Spring Veggie Soup


I know, I've been away from here for far too long. I haven't forgotten about this space, or the people who stop by here, I've been thinking of it all very often. But I've been unable to make myself write anything recently, and I blame this on benadryl. I've been on benadryl every day for more than a month, but I'm delighted to say that I'm back and feeling much more like myself again. I owe this recovery to my holistic allergist. I know I said before that I was sceptical about the BIE allergy treatments I've been having...but I think I'm proof that they work!

My allergist has been clearing me for a lot of different foods, but most importantly, she has been clearing me for different emotions. She has a theory that many allergies are caused by emotional issues; your body creates allergies as a response to things it cannot properly deal with. (I know, it sounds crazy...but it actually works!) She helps my emotional issues by clearing them with BIE, and using something called Neuro Emotional Technique (NET). For me, the big emotions are stress and anxiety, and I can tell that it's working!

She has also begun clearing me for bread crumbs and the smell of wheat baking, since I have allergic reactions to airborne wheat. Since this clearing I have smelled the bread baking for Subway sandwiches while standing in a store adjacent to it, without a reaction. I started sneezing and thought that I was going to have a reaction, but it stopped. It stopped! A-mazing.

I will post more about BIE another time, but for now I have a recipe I have been excited to share. I created this soup when we had a fridge full of veggies and needed something for dinner. It was perfect the first time, and I have been able to re-create it a few times since. I call this my Spring Veggie Soup because it takes advantage of delicate asparagus, and deliciously sweet peas. It is too early in the year for those to be harvested here yet, but they are readily available in grocery stores. I tend to always have frozen peas in the house, I agree with Jamie Oliver and think that they are the best frozen veggie, mostly because they do not lose much of their integrity when frozen.


Spring Veggie Soup

2 onions
1 fennel bulb
2 cups/500 mls of chopped celery, about 4-6 sticks, depending on size. You can include the leaves too, if you wish.
1 tsp dried thyme leaves, not ground
1 tsp dried lavender, not ground
about 12 cups/ 3 litres of chicken or veggie stock
2 cups/500 mls of chopped asparagus, about one bunch
1 cup/250 mls of peas, fresh or frozen
sea salt and pepper, to taste
juice of one lemon
a few pinches of lemon zest


Slice onion and fennel thinly. In a large pot add the onions and fennel, some oil, and a teaspoon or two of sea salt. Cook on medium heat until caramelized, about 20-30 minutes. Add celery, thyme, lavender, and stock.  Simmer until celery is nearly tender. Add asparagus, and simmer until nearly tender, about a minute or two. Add peas and bring them to temperature. Season to taste with salt, pepper, lemon juice, and zest. Serve hot and enjoy!


Notes:

- This makes a big pot of soup, if you want a smaller batch simply reduce the quantity of the veggies by half.

- The asparagus and peas will be vibrant green if you eat this soup right away. While they sit in the soup they will lose that colour, so if that is important to you try serving this right away. While you do lose colour in those veggies as time goes by, you gain flavour so do not be discouraged.

- If you only have ground spices then make sure to reduce the amount listed here, and season to taste.

Alterations:

- If you are allergic to onions and/or fennel you may make this soup without them, but make sure you have a flavourful stock to compensate.

- If you are allergic to any of the green vegetables, or the herbs listed simply omit them or replace them with your favourite.

- If you are allergic to lemons you may simply omit the zest from the soup. You will want a bit of acidity in the soup, so try replacing with apple cider vinegar, but go slowly and keep tasting to ensure you do not overdo it.

I have linked this recipe with Allergy Friendly Friday (Saturday this week). Check out the other amazing recipes there!

*Please Note* These recipes are part of my personal allergy diet. Please remember that everyone's allergies are different.  If you are unsure about any ingredients listed in these recipes please check with your doctor before introducing.

Wednesday, February 15, 2012

Candied Meyer Lemons


Because of my allergies I have not yet found a store-bought candy that I can eat. These Candied Meyer Lemons are a great alternative to store-bought candies, and have brought a little bit of joy into my life! If your allergies are anything like mine, I think you will appreciate these candies too. I was so pleased with how these turned out, even the first time that I made them. This is pretty much a fool-proof recipe. And although these candies take a bit of time to cook and set, they do not demand a lot of your attention or energy. I gave these Candied Meyer Lemons as Christmas gifts this year, and they were really well received. My grandparents told me they were just like English candied fruit, which they hadn't had in years! My mom loved them because they are just like the fruit gummies she is so fond of. And my sister has called them a "ray of sunshine on a cold winter day". Not bad, not bad at all!

I tried to find a candied lemon recipe online but the results were different than what I was looking for, so this is a combination of recipes that I have read, as well as some of my own ideas. The resources I read online are:

How to Make Candied Lemon Slices from ButterYum
Candied Lemon Slices from Ryan's Baking Blog
Dan Lepard's Candied Lemon Friands Recipe from The Guardian UK


Candied Meyer Lemons

Meyer Lemons (I generally use 6-8 lemons)
Water for boiling
Sugar syrup-1 part sugar, 2 parts water (for 6-8 lemons you will need about 4 cups of sugar, to 8 cups of water)

Slice the lemons into rounds, approximately 1 cm thick. Gently remove all seeds. In a large pot boil enough water that will cover the lemon slices. Once boiling, add lemons, boil for about 5 minutes and then drain (this removes any bitterness from the lemons). In the same pot make the sugar syrup. Make sure to combine enough sugar and water that will cover your lemons and allow them to float in the pot. Gently heat to dissolve the sugar. Add lemon slices and gently bring to a simmer. Turn down the heat to low, cook lemons in sugar syrup, barely simmering, for about 6 hours. Gently stir the lemons and syrup about every half-hour or hour. To check to see if they are done, pick the thickest slice and try to break through the peel with a wooden spoon (I do this against the side of the pot). 

Once the lemons are soft enough to break through the peel, you have three choices:

1) Drain them and make candies. 
2) Store them in a jar in their syrup to use as a spread on toast, or a topping on pancakes, ice cream, yogurt, or add it to mineral water or mixed drinks. (The syrup tastes similar to marmalade, which is great for me because I am allergic to orange, but can tolerate lemon.) 
3) Drain them and make candies, but reserve the syrup for a spread etc. 

If you are making candies, simply lay them onto a cooling rack over a cookie sheet (to catch any drips) and let set for a couple of days. You want them to be just slightly tacky to the touch, so be patient. Once set you can press them into sugar and then store them in a container, separating the layers with parchment paper. If you do not want them sugar-coated then they will still be OK, just a little sticky.

Notes:

- If you notice that the sugar syrup is dwindling, just add more syrup. You want to make sure the lemons are always floating in the syrup and not touching the bottom of your pot, so as not to stick and burn.

- It is normal for the syrup to darken as the cooking progresses, however, do not let the syrup burn.

- If the lemons are not cooked enough but you cannot monitor them for a while simply turn off the heat and allow them to sit in the syrup until you are available to cook them again. I have even let them sit overnight with success.

- Most vegans to not eat refined, white sugar, so if you want this recipe to be vegan you would have to use raw sugar instead.

Alterations:

- If you do not have access to Meyer lemons you can use regular lemons, however they will take much longer to cook because their rind is tougher and thicker, and they will not have as delicate a flavour as the Meyer lemons do. You may also want to experiment with other types of citrus, but the cooking time will differ depending on the thickness of the rind.

- I think that this recipe would work well with honey in place of sugar, although I have not tried it yet. Because honey is a humectant it will probably change the moisture of the candies, and they may need longer to set, or they may remain sticky indefinitely.

I shared this post with Allergy Friendly Friday. Check out the other great recipes there!

*Please Note* These recipes are part of my personal allergy diet. Please remember that everyone's allergies are different.  If you are unsure about any ingredients listed in these recipes please check with your doctor before introducing. 

Monday, January 30, 2012

Chocolate Peppermint Cake


Since I've missed the boat with most of my holiday recipes in the past, I've made a commitment to post something for Valentine's Day celebration before Valentine's Day. Actually, I'm cheating a bit...This is a recipe that I made a lot at Christmas time, but really it is suitable for a dessert any time of year. And it contains a lot of chocolate, so I figure it is especially suitable for Valentine's Day.

This has been voted by my family and friends as the best "Sheena Cucina" cake yet. I agree. This cake is so rich, fudgey, and moist, and although it is filling, it still often leaves you wanting more. To make this cake even more decadent I have created a chocolate-peppermint ganache to top it off. The cake itself is low in fat; most of its moisture comes from applesauce. You can serve the cake on its own, without the icing, it will still be delicious. However, I suggest that you indulge and serve the cake with this ganache.

This much-altered recipe was originally titled Peppermint Fudge Cake and it comes from Heather Van Vorous' book Eating For IBS. I have been making this cake for years directly from the recipe in this book. When I first realized that I had food allergies, I simply went without most of my old stand-by recipes. Because this cake is so delicious, I was determined to alter this recipe to suit my current diet, and yield a delicious cake. I have changed most of the ingredients and after many, many, many attempts I have finally perfected my version of this recipe. Enjoy!

Chocolate Peppermint Cake
1 1/2 cup sorghum flour
1/2 cup white bean flour
2 teaspoons baking soda
6 tablespoons cocoa powder (I prefer Navitas Naturals)
2 tbsps tapioca starch
3/4 cup sugar
1/2 teaspoon salt
1 cup semi-sweet chocolate chips (optional, but delicious) (I prefer Enjoy Life)

2 cups applesauce 
1/4 cup sunflower oil, or oil of your choice
1 tbsp pure vanilla extract
1 tbsp natural peppermint flavouring (I prefer Simply Organics)


Preheat oven to 325°/167°. In a large bowl, sift all dry ingredients together accept for chocolate chips. In a medium bowl combine wet ingredients. Add wet to dry and stir just until combined. Mix in chocolate chips. Pour into a greased non-stick bundt pan. Bake for approximately 55 minutes. Cool on wire rack for at least 15 minutes, then remove from pan. Alternatively you can bake this into cupcakes - bake for approximately 20-25 minutes. Serve cake/cupcakes warm or cold, topped with Chocolate Peppermint Ganache.


Chocolate Peppermint Ganache

1 cup semi-sweet chocolate chips
3 tbsps vegan butter
3 tbsps rice milk, or milk of your choice
1-2 tsps peppermint extract
A few pinches of salt, to taste

Combine chocolate chips and vegan butter in a saucepan or double-boiler. Melt over low/medium-low heat. Once melted, add rice milk and stir to combine. Remove from heat and add peppermint extract and salt to taste. Pour over cake and serve. 

 Alterations:

- If you are allergic to any of the flours mentioned above, you can use your favourite gluten-free flour blend. I have also made this cake with brown rice flour in place of the white bean. While this still made a delicious cake, it was very crumbly. If you chose to omit the bean flour, you may want to add in some xanthan gum (about 1 tsp) or a different gum to help bind the cake. If you do use a gum to bind, you would probably be able to omit the tapioca starch as well.

- If you are allergic to peppermint extract, simply omit it. You will still be left with a delicious chocolate cake. 

- If you are allergic to apples, try substituting applesauce for another fruit puree like plum or pear.  I do not suggest you use banana because the banana flavour will interfere with the chocolate and peppermint. 

- If you are serving this cake for Christmas, you may want to decorate it with some crushed-up candy canes. It looks so festive!

Oops, I forgot to mention this in my initial post: 

- If you are sugar-free try substituting the sugar in the cake for coconut sugar, date sugar, stevia, agave, or another sweetener of your choice. I have only made this with sugar, but I'm sure you would have comparable results. If your sweetener is in liquid form you may have to adjust the baking time slightly. If you are using something like stevia (which is way sweeter than sugar, and cannot be replaced cup-for-cup) use proper measurements to ensure that you do not over-sweeten the cake.

- If you are sugar-free make sure you buy unsweetened chocolate chips for the ganache, and add sweetener as needed.

Tips:

- If your bundt pan sticks a little, you may want to grease your pan and then dust it with cocoa powder to prevent your cake from sticking. 

- I searched for months to find a cocoa powder that was guaranteed gluten and wheat-free. As mentioned above, I used Navitas Naturals Cacao Powder (certified organic, kosher, gluten-free, vegan, and raw). You may also want to try Now Foods Organic Cocoa Powder (free of sugar, salt, starch, yeast, wheat, gluten, corn, soy, milk, egg, or preservatives) although I have not been able to purchase this anywhere in Canada.

I have linked this post to: Fat Tuesday, Slightly Indulgent Tuesday, Real Food Wednesday, Health 2day Wednesday, Allergy Friendly Friday. Check out the other great posts there!

*Please Note* These recipes are part of my personal allergy diet. Please remember that everyone's allergies are different.  If you are unsure about any ingredients listed in these recipes please check with your doctor before introducing.
Monday, January 23, 2012

Herbed Goat Cheese Ball


Herbed Goat Cheese Ball
Over the Christmas holidays I got together with some of my girlfriends from high school. I brought a spread of finger foods food for everyone. I made some Rosemary Flatbread and served it with caramelized onions, garlic, and ginger, and roasted sweet potato - this was inspired by my Flatbread with Roasted Squash and Caramelized Onions, Garlic, and Ginger. We also had some smoked salmon (store-bought, I admit), a green olive tapenade (recipe to follow soon), and the favourite of the night - Herbed Goat Cheese Ball. It was a serve-yourself affair, all of the dishes laid out before us. This way everyone was free to take a bit of this, and a bit of that to make their own combination of flavours. A great combination is caramelized onions, garlic, and ginger alongside the Herbed Goat Cheese Ball on some Rosemary Flatbread. SO delicious!

Caramelized Onions, Garlic, and Ginger

I realize that my blog usually does not include recipes with casein, so I never use dairy, but I have just been able to re-introduce goat cheese and yogurt with some success. It is possible that goat milk is giving me migraines, but I am going to see if my holistic allergist can help with that. I have heard that some people with dairy sensitivity, or digestive problems, can tolerate some goat milk products, while they cannot tolerate cow's milk. I'm going to look into this further. As always, be sure to check with your doctor before introducing anything new into your diet. If you are casein or dairy-free, I'm sure this recipe would work well with any non-dairy cream cheese.

This recipe is dead simple, so I feel a little silly for posting it. BUT, my friends insisted that I include it on my blog, so that they could make it to impress company. I thought this was quite a compliment. I hope that you and your guests enjoy it too!


The Perfect Lunch: Apple Slices and Rice Crackers Topped with: Herbed Goat Cheese Ball, Caramelized Onions, Garlic, and Ginger
Herbed Goat Cheese Ball

This cheese ball takes only a minute to make. If you have time, try to make it the day before you wish to serve it, as this allows time for the flavours to meld nicely together. If you cannot make it in advance, it is also delicious served right away.

About 1/2 cup soft, unripened goat cheese
1/4 tsp garlic powder
1 tsp dried basil
1 tsp dried rosemary
Pinch of pepper

In a small or medium bowl mash goat cheese with a fork until it is a bit softer and broken up. Add the spices and pepper and mix thoroughly to combine. Once combined, take cheese in your hand and gently form into a ball.

You could serve this cheese ball as mentioned above, as an addition to a cheese plate, or with your favourite bread or crackers and some apple slices for the perfect lunch. Alternatively, instead of making this into a ball, you could crumble the goat cheese and herb mixture over a salad, pizza, or pasta. Yum!

Alterations: (updated, I forgot to include this in the original post)


- As mentioned above, if you are dairy or casein-free you can try making this recipe with dairy-free cream cheese. I haven't tried this, but I'm sure it would be equally as delicious.

- If you are allergic to any of the herbs in this recipe simply omit them, or create your own spice blend.  

I have linked this post to Allergy Friendly Friday, Slightly Indulgent Tuesday, Fat Tuesday, Real Food Wednesday, Health 2day Wednesdays. Check out the other great recipes there!

*Please Note* These recipes are part of my personal allergy diet. Please remember that everyone's allergies are different.  If you are unsure about any ingredients listed in these recipes please check with your doctor before introducing.

Wednesday, January 11, 2012

Review: Sunsational Sunflower Seed Milk


It was just this summer that I wondered to myself why no one had created a sunflower seed milk.  Lately I feel like the market of non-dairy milk is overwhelmed with soy, almond, and coconut milks, none of which I can have. Now I feel so lucky. I have had the opportunity to test out a new product on the market - Sunsational sunflower seed milk! I wasn't chosen to do this (I volunteered to post something on my blog) but I feel especially lucky because this product isn't available on Canadian store shelves yet, and has only recently launched in the US.  I first read about this milk on Vegansaurus and From Seed To Stomach.


I have had this milk for a couple of weeks already, but have only just been able to try it now. Because of the nature of my allergies I always have to be careful when introducing something, so I wanted to make sure that I only tested it once my schedule was clear.

Sunsational comes in two flavours, original and vanilla. My husband and I tried both of them. It has a delicious nutty flavour reminiscent of a mixture of soy, almond, and hemp seed milks (which I have not had in years, but this is how I remember them). The vanilla is not over-powering, but it has a delicious, subtle hint of this flavour. I like this because it does not overwhelm the sunflower nuttiness, which I think is a huge success. It has quite a pronounced flavour, which I enjoy, but it may not work for every recipe that requires milk. This milk would do well in a chocolate flavour, and I hope the company thinks about this for the future.


As I've said before, my diet is super limited right now which means that my options for non-dairy milk are slim-to-none. I generally drink President's Choice Organics Rice Milk and find it quite delicious. One of my pet-peeves of rice milk is the high sugar content. Although PC's rice milk does not have any added sugar, the natural sugars in the rice still make it sweeter than I would prefer. I was pleased that Sunsational has a much lower sugar content than rice milk - almost half as much! Sunsational is creamier than rice milk, having one gram more of fat per serving (than the PC Organics kind) which gives it a bit of a velvety texture, especially compared to rice milk. This milk is grey in colour, which is a little surprising. I got over it quickly, it's not a big deal, but it is a little shocking at first glance. The plus side of this strange colour is that they are not altering the natural colour.

From our experimentation, this milk is delicious on its own, on cereal, in tea, or in smoothies. I'm going to try it out in my Sunbutter Chicken Fingers, I think it will add to the delicious nuttiness. I'm also going to try it in my Chocolate Chip Pancake recipe, and think it will be delicious!

If you live in the US, I understand that Sunsational is available at Whole Foods Markets. You can also order it directly from the Sunsational website here. I hope that if given the chance, you try out this new, delicious milk.