Friday, December 30, 2011

Stuffing


OK, I know. I've been bad. I've neglected my blog for a little while now but it's only because I've been on the go constantly for over a week. I've had a break today, so I'm back!

I know I promised Christmas recipes, before Christmas, but I'd like to make it up to you now. I know that some of you are sick of turkey (what?!) but just wait a week or two and you'll want a roast chicken or turkey again. This recipe for stuffing doesn't have to be just for Christmas. I know that I'm going to use it often. I roast a chicken about once a week, and this stuffing will be the perfect accompaniment.

My Granny swears by Paxo stuffing, and that has always been my favourite. This is the closest I have come to re-creating that flavour. 

I have altered this recipe from Enjoy Life's website here. I hope you enjoy! And merry be-lated Christmas for all you Christmas-celebrators.


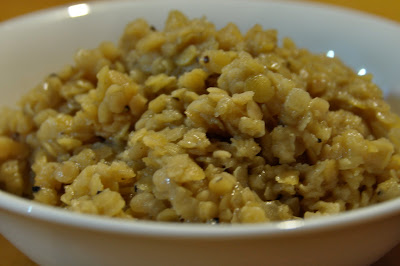
Stuffing

2 ½ C Enjoy Life Crunchy Rice Cereal
2 stalks celery
½ large onion
1 tbsp Herbes de Provence or a combination of rosemary, marjoram, savory, basil, and lavender
1/2-1 tsp dried ground sage (depending on your taste)
1t salt
⅛ t black pepper, ground
About 1 cup of vegetable stock, poultry stock, or water
A few tablespoons of chicken/turkey drippings and roasted onions, or olive oil if you want a veggie version (see note)*

Partially grind the crunchy rice cereal so that it resembles large bread crumbs - this is easiest to do if you pulse your blender/food processor. Put cereal crumbs into a medium bowl. Finely dice celery and onion and add to cereal crumbs. Add herbs, salt, and pepper. Stir to combine. Add stock/water and mix. If you have roasted a turkey or chicken, add a few tablespoons of the drippings and some roasted onions and garlic, if you have them (see note)*. Check seasoning and adjust salt, pepper, and spices to your taste.

To bake a dish of stuffing: 

Preheat oven to 350°F.-400°F/ 176°C-204°C. Pour mixture into a greased baking dish with a lid. Bake for about 20-25 minutes (depending on the temperature of your oven) with the lid on, just until the onions and celery are soft. Finish cooking for about 10-15 minutes with the lid off. This allows the excess moisture to evaporate from the stuffing and allow it to crisp up a bit. Serves 4-6.

If you want to stuff your bird:

Add just enough liquid to moisten your stuffing slightly. For our Christmas turkey I stuffed under the skin on the breasts of the bird and it was delicious! I read this on Jamie Oliver's blog here (he is always full of amazing ideas!). The reason for this is that the breasts cook faster than the legs on a turkey. If you stuff the breasts, it helps the turkey cook more evenly, which prevents the turkey breasts from drying out. He suggests not to stuff the inside of a turkey because it prevents it from cooking properly, and can be unsafe.

Alterations:

- If you are allergic to rice but have a favourite bread or cereal, try experimenting with that instead of the Crunchy Rice cereal.

- If you are allergic to celery or onions, simply omit, or replace with veggies of your choice.

- If you are allergic to any of the herbs mentioned, try making your own combination.

 Notes:

- * Another note from Jamie Oliver that I have adopted to my cooking is to add onions (and sometimes garlic) to the roasting pan. This prevents spots on your pan from burning, and leaves you with a delicious accompaniment to your roast chicken or turkey. I simply slice onions, and add them to the pan.If using garlic, throw whole cloves in, no need to peel. When they are roasted, just squeeze out the garlic from its skin. I found that the stuffing is at its best with the addition of a few spoonfuls of roasted onions, garlic, and chicken/turkey drippings. Yum!

- Do NOT try substituting puffed rice or crisp rice (like Rice Krispies) for the Crunchy Rice cereal here. It will end up as mush. Tasty, but mushy.

- The Enjoy Life site suggests you can use Crunchy Flax cereal instead of the Crunchy Rice but I have found that the flavour is not as good in this recipe.

- I have included a range for the cooking temperature so that you can cook this along with other parts of your meal, like roasted veggies, and not have to alter the oven temperature.

Friday, December 16, 2011

Sunbutter Chicken Fingers

Sunbutter Chicken Fingers with Sweet Potato Fries
I have some more Christmas recipes coming, and soon. But, in the mean time, here is a delicious dinner recipe. My sister came up with this idea, so I give her full credit.

My diet is completely lacking in convenience food. This recipe, of course, is much healthier....but who am I kidding? I want "fast food" sometimes too! I don't crave it anymore, having been off of it for a few years now, but it's the novelty that I miss. I often wish that I could just eat something out of a can, or the freezer, and not have to cook something from scratch! I'm sure that you, or you kids, with allergies feel the same way sometimes. I'm reminded of a blog I read a while ago. It was written by the mom of a child (I think a son) with allergies. He wanted to be able to take a lunchable-type lunch to school, like all of his friends. For those of you not familiar with this product, it's a pre-packaged lunch that includes crackers, and small pieces of cheese and meat to go on top. Not the most exciting of foods, but it's the novelty that counts! This wonderful mom made her son a home-made version and he was thrilled! I'm usually good at remembering where I read something, but this time the name of the blog slips my mind and I haven't been able to figure it out. If you happen to know the blog that I'm talking about, please let me know so that I can mention her in this post.

These chicken fingers are healthy, delicious, and they give you the novelty of eating convenience food. They have a rich, nuttiness from the sunbutter. I served them with sweet potato fries but I think they would also go really well with my Sweet Potato Fritters. These chicken fingers can even be made in advance and frozen - either before or after cooking. This way you can eat something straight from the freezer :) I hope you enjoy!

Sunbutter Chicken Fingers

Sunbutter Chicken Fingers

- Three boneless, skinless chicken breasts
- About 1/2 cup of sunflower seed butter
- About 1/2 cup rice milk
- About four cups of crisp rice cereal 
- Salt and pepper, to taste
- Spices for seasoning (optional) I used a few pinches of garlic powder and dried basil

Preheat oven to 400˚F/204˚C. Slice your chicken breasts into fingers (or nuggets, if you prefer) trying to make them all a comparable size. Place your sunbutter in a wide bowl and microwave to warm slightly - I did mine for about 30-40 seconds at 10 second intervals. You just want the sunbutter to become a little more pliable, not hot. Slowly mix rice milk into sunbutter until you have reached a similar consistency to an egg.  In a blender or food processor combine rice cereal, salt, pepper, and spices, if using. Blend until mixture resembles bread crumbs. Taste coating and adjust seasoning, if necessary. Place crumbs into another wide bowl. Dip chicken pieces into sunbutter/rice milk mixture, and toss in rice cereal crumbs. Place on parchment-covered baking sheet, and bake for 20 minutes, flipping half-way through. The suggested temperature for chicken breasts is 170° F/77°C. Dip in your choice of sauce, or serve plain. Serves four.

Alterations:

-If you are allergic to sunflower seeds, then use whatever seed or nut butter you can tolerate. You could also use an egg, if you prefer, but you will lose the nuttiness that the sunbutter gives.

- If you are allergic to rice, use whatever cereal/bread/crackers that you prefer and blend into crumbs. You can also replace the rice milk with any milk of your choice.

- If you do not have rice cereal on hand, you may be able to find rice bread crumbs. Make sure you read the ingredients, some contain potato starch and other surprise ingredients!

- Feel free to experiment with other spice combinations, or omit if you prefer.

- If you are making nuggets instead of strips they should take less time to cook so adjust the cooking time accordingly.

Notes:

- These can be frozen either raw, or cooked. Place chicken fingers in a single layer on a cookie sheet or plate and freeze. Once frozen, keep them in a bag, or wrap in parchment or tin-foil. If you freeze them raw, you will have to cook them for a bit longer than 20 minutes - make sure they reach the proper internal temperature. If you freeze them pre-cooked, simply re-heat in the oven or microwave.

- Compared to other home-made chicken finger recipes this recipe is egg-free, wheat-free, and dairy-free. 

- Compared to store-bought chicken fingers these are also preservative free.

- Compared to other gluten-free chicken fingers I have seen in stores, these are corn-free, potato-free, soy-free, and nut-free.

- Make sure to not over-crowd your cookie sheet. This will help your chicken fingers crisp-up.

I have linked this recipe to Allergy Friendly Friday, Freaky Friday, Living Well Blog Hop.

*Please Note* These recipes are part of my personal allergy diet. Please remember that everyone's allergies are different.  If you are unsure about any ingredients listed in these recipes please check with your doctor before introducing.

Tuesday, December 06, 2011

Ginger Mashed Sweet Potatoes


The holidays are nearing and I hope to get as many recipes as possible posted between now and then. Let's hope my health can cooperate this time :)

If you have allergies, you already know that it's tough to visit with people when food is involved. For peace of mind and ease of organizing I generally bring all, or most, of the food for the event. At the very least I will bring food for myself. To those of you who do not have allergies this may seem like overkill, but to me, it keeps my sanity.

I'm sure that a lot of you follow similar rules, which means that holiday cooking can be extra busy for you. I hope that this recipe for Ginger Mashed Sweet Potatoes cuts down on some of your busy-work as you prepare for the holiday festivities. This recipe is delicious - the citrussy zing of fresh ginger pairs so elegantly with the rich, buttery sweet potatoes. This is so simple, and easy to prepare. It can even be made in advance and re-heated - it may even be better that way because the flavours have time to meld together. I'm sure that you and your friends and family will love this addition to your holiday meals.


Ginger Mashed Sweet Potatoes

4-5 medium-sized sweet potatoes (preferably organic, see notes)
About 2-3 thumbs of ginger (3-4 tbsps once grated), or to taste
Salt and pepper
2-4 tbsps of light tasting oil of your choice, I used sunflower oil (optional)

Preheat oven to 400˚F/204˚C. Cover a baking sheet with parchment paper. Prick your sweet potatoes in several places with a knife or a fork and place on your baking sheet. Bake in the oven for about 45 minutes, or until soft. Cool sweet potatoes until they are easy to handle. In a medium or large bowl, scoop out the flesh of the sweet potatoes. Finely grate ginger and add to sweet potatoes. Mash together with a fork or potato masher until combined. Add oil, if using, and mash until desired consistency is reached. Season with salt and pepper. Serves 4-6.


 Alterations:

- If you are allergic to sweet potatoes, you may want to try using squash instead. I have not tried this, but imagine that it is equally as delicious.

- If you are allergic to ginger simply omit, or replace with a different spice of your choice. I think some ground cinnamon would also be delicious.


Notes:

- I suggest that you try to find organic sweet potatoes. I try to buy organic when I can, but I am on a tight budget so I have to pick and choose which foods I purchase organic. I have found that some foods are incredibly improved upon if they have been grown organically and sweet potato is one of them. We even eat the skin of organic sweet potatoes, it will give you some extra fibre too - although not in this recipe!

- If you want to make these in advance simply refrigerate them and re-heat once you are ready to serve. I find that they keep well for 5-7 days, if they are not eaten up already! Alternatively you could also bake the sweet potatoes in advance and refrigerate them in their skins, then mix everything together another day.

- If you are cooking something else in your oven at a different temperature you can probably bake your sweet potatoes at the same time. I have baked them at anywhere from 375˚F/190˚C - 450˚F/232˚C, although the baking time will differ so keep an eye on them.

- If you love the combination of sweet potato and ginger, try my Sweet Potato Fritters!

I have linked this post to: Fat Tuesday, Slightly Indulgent Tuesday, Real Food Wednesdays, Health 2 Day Wednesdays, Allergy Friendly Friday, Freaky Friday, Living Well Blog Hop . Check out the other great recipes posted there!

*Please Note* These recipes are part of my personal allergy diet. Please remember that everyone's allergies are different.  If you are unsure about any ingredients listed in these recipes please check with your doctor before introducing.

Thursday, November 24, 2011

Food For Thought - 7 Foods So Unsafe Farmers Won't Eat Them

Here is some food for thought. I read an article a few days ago and thought about posting it here. I didn't at first because it's not a recipe - which, so far, all of my posts have been. But I have found myself thinking about it a lot since so I have decided to start a new section of my blog for information that I think could be helpful for others.

This article is titled "7 Foods So Unsafe Farmers Won't Eat Them". And although it is more than a year old, I believe the information is still pertinent. The foods it lists are:

1. Canned Tomatoes
2. Corn-Fed Beef
3. Microwave Popcorn
4. Conventionally Grown (Not Organic) Potatoes
5. Farmed Salmon
6. Milk Produced With Artificial Hormones
7. Conventional Apples

I already can't eat the majority of foods listed here, but this article has still made me think about my food. Please click on the link above to read the full article. I hope you find it helpful and incorporate some of the suggestions into your diet.


-Sheena

Wednesday, November 23, 2011

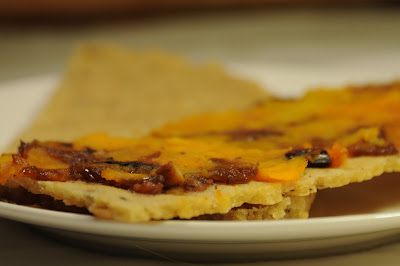
Flatbread with Roasted Squash, Caramelized Onions, Garlic, and Ginger


This is a recipe I hope will be helpful for my readers from the US who are celebrating Thanksgiving. I missed posting something special for Canadian Thanksgiving, so hopefully this makes up for that :) My husband and I just came up with this recipe last night - I realize it's a little late, so I apologize for not being able to post sooner. This recipe is so quick and simple to make, and I'm sure you already have most, if not all, of the ingredients on hand. This is also a great recipe to serve the day after your big Thanksgiving feast because you can use up any leftover squash.

Now, from my photos this recipe does not look glamorous. I could have made it look a bit better but I was in a benadryl fog, so this was the result. Do not be fooled by the different steps I have outlined below, this bread is so simple to make (and it is so, SO delicious). We ate this last night with a simple vegetarian curried soup and it was a perfect meal. This bread would be great as an appetizer, an entree (like pizza) served with a nice salad on the side, or an accompaniment to any soup. Try it with my Onion Soup or Golden Hubbard Squash Soup.

This recipe is a variation of my Rosemary Flatbread with Caramelized Onions.


 Flatbread with Roasted Squash, Caramelized Onions, Garlic, and Ginger

Please note - I would prepare the steps of this recipe in the order listed, so that you save a  bit of time.

Roasted Squash:

Use leftover squash, (you only need about one cup) or follow these directions for roasted squash

One small squash - I used butternut because that is what I had on hand, but feel free to use whatever is available.
3-4 tbsps olive oil, or oil of your choice
Salt and pepper

Preheat oven to  400˚F/204˚C. Cut squash in half, scoop out the seeds (save for roasting - they are delicious!). Massage some oil, salt, and pepper into the flesh of the squash and place cut-side down on a baking sheet covered in parchment. Place on the bottom rack of your oven and roast until tender. It will take approximately 20-45 minutes, depending on the type and size of your squash. Serve on flatbread.

- This method will give you some nice caramelization on the squash. If you do not want this, add a bit of water to your baking sheet so that the squash steams instead.

If you want a fancier-looking flatbread:

Preheat oven to  400˚F/204˚C. Cut your squash into smallish cubes. Toss with oil, salt and pepper and place on a baking sheet, covered in parchment paper. Roast on the bottom rack for about 20-30 minutes, turning frequently to brown as many sides as possible. Serve on flatbread.

Caramelized Onions, Garlic, and Ginger:

4-5 medium-sized onions
4-5 cloves of garlic
About 2 thumbs (works out to about 3-4 tbsps) of fresh ginger root
About 4 tbsps of olive oil, or oil of your choice

Try to slice onions no more than 5mm/0.19in thick - the thinner they are sliced, the quicker they caramelize. Place onions and oil in wide-bottomed pot or pan. On medium heat, bring your onions to a simmer, stirring occasionally. As the onions cook and begin to brown you will have to stir them more often so make sure to keep an eye on them. If you notice them starting to burn then turn down your heat. De-glaze your pan every once-in-a-while with some water, making sure to scrape off the caramelization from the bottom of your pan. To tell when your onions are done, look for a deep caramel colour, like the photo above.

Mince garlic and ginger and add to caramelized onions. Cook on medium-low heat until the garlic and ginger are tender (about 5-10 minutes). Season with salt and pepper and serve on the flatbread.  

Note: If you happen to be making my Onion Soup, reserve about 1/3 cup of your caramelized onions for the flatbread.

Flatbread:

2 cups/500 mls brown rice flour
1 tsp salt
Pinch of ground pepper
1 cup/250 mls water
1/4 cup/60 mls olive oil or oil of your choice

Preheat oven to 400˚F/204˚C. Line a baking sheet with parchment paper and grease with a generous amount of oil. In a medium-sized bowl mix brown rice flour, salt, and pepper. Mix oil and water in a small bowl and add to dry ingredients. Using a wooden spoon or your fingers, stir until combined. The mixture will be like a wet dough or very thick batter. Using your hands or a spoon, drop the dough onto the baking sheet. With oiled fingers pat dough to about 1 cm/0.39 inches thick. Bake on the bottom rack of your oven for 15-20 mins, or until the bottom is golden brown and bread is firm to the touch. Top with Butternut Squash, Caramelized Onions, Garlic, and Ginger.

Serves 4-6 as a side dish or appetizer. If you are serving this as an entree you may want to double the recipe.

Notes:

- If you find your bread needs a little longer to cook, make sure to watch it carefully because it will burn very quickly.

Alterations:

- If you are grain-free but can eat legumes: I have made this bread with chickpea flour with decent success but the bread turns out a bit more dry. You may have to adjust the amount of liquid or oil to ensure your bread is moist enough. I have recently become allergic to chickpeas, or else I would figure out the measurements for you!

- If you are allergic to onion, garlic, or ginger simply omit them, or create your own spice blend.

- If you are allergic to squash you may want to use sweet potato. It will give you different results but I'm sure it will be equally as delicious.

- You can use this bread for a pizza crust but I suggest that you pre-bake the crust almost until cooked. If not, you may end up with a soggy crust.

I linked this post to Fat Tuesday, Slightly Indulgent Tuesday, Real Food Wednesday, Gluten-Free Wednesdays, Health 2 Day Wednesdays, Allergy Friendly Friday, Freaky Friday, Living Well Blog Hop. Check out the other great recipes linked there!

*Please Note* These recipes are part of my personal allergy diet. Please remember that everyone's allergies are different.  If you are unsure about any ingredients listed in these recipes please check with your doctor before introducing.

Wednesday, November 16, 2011

Rosemary Flatbread with Caramelized Onions


Rosemary Flatbread with Caramelized Onions

It was about a year and a half ago when I first went gluten and wheat free. It was part of a Brown Rice Cleanse, a kind of elimination diet. The original plan was for me to cleanse for two or three weeks, and then begin to re-introduce foods. The hope was to find out what had caused my chronic migraines. To date, I have successfully re-introduced just a handful of items, and found many along the way that I am allergic to, a lot of which cause anaphylaxis.

Surprisingly, one thing that I didn't miss at the beginning of my elimination diet was bread. Now this has changed, let me tell you. I catch myself daydreaming about crusty baguettes or toast with butter and jam.

Mmm...

Because of my elimination diet, I'm also not eating yeast or eggs, so this makes baking very difficult. I still can't make a successful loaf of bread, but I have created a delicious flat-bread that can be topped, or dipped, any number of ways.  I suggest topping it with caramelized onions or serve it with my Baked Artichoke Dip or Roasted Zucchini and Garlic Dip.

Rosemary Flatbread

2 cups/500 mls brown rice flour
1 tsp salt
2 tbsps dried rosemary leaves
Pinch of ground pepper
1 cup/250 mls water
1/4 cup/60 mls olive oil or oil of your choice

Preheat oven to 400˚F/204˚C. Line a baking sheet with parchment paper and grease with a generous amount of oil. In a medium-sized bowl mix brown rice flour, rosemary, salt and pepper. Mix oil and water in a small bowl and add to dry ingredients. Using a wooden spoon or your fingers, stir until combined. The mixture will be like a wet dough or very thick batter. Using your hands or a spoon, drop the dough onto the baking sheet. With oiled fingers pat dough about 1 cm/0.39 inches thick. Bake on the bottom rack of your oven for 15-20 mins, or until the bottom is golden brown and bread is firm to the touch. Serve topped with caramelized onions (recipe below), your choice of toppings, or try it with my Baked Artichoke Dip or Roasted Zucchini and Garlic Dip.

Note: If you happen to be making my Onion Soup, reserve about 1/3 cup of your caramelized onions for the flatbread. Or use the recipe below:


Caramelized Onions


Caramelized Onions

4-5 medium onions
3-4 tbsps of olive oil, or oil of your choice
Salt and pepper to taste

Try to slice onions no more than 5mm/0.19in thick - the thinner they are sliced, the quicker they caramelize. Place onions and oil in a large, wide-bottomed pot. On medium heat, bring your onions to a simmer, stirring occasionally. As the onions cook and begin to brown you will have to stir them more often so make sure to keep an eye on them. If you notice them starting to burn then turn down your heat. De-glaze your pan every once-in-a-while with some water, making sure to scrape off the caramelization from the bottom of your pan. To tell when your onions are done, look for a deep caramel colour, like the photo above. Season with salt and pepper and serve with the flatbread.

Notes:

- If you find your bread needs a little longer to cook, make sure to watch it carefully because it will burn very quickly.

Alterations:

- If you are grain-free but can eat legumes: I have made this bread with chickpea flour with decent success but the bread turns out a bit more dry. You may have to adjust the amount of liquid or oil to ensure your bread is moist enough. I have recently become allergic to chickpeas, or else I would figure out the measurements for you!

- You can use this bread for a pizza crust but I suggest that you pre-bake the crust almost until cooked. If not, you may end up with a soggy crust.

*Please Note* These recipes are part of my personal allergy diet. Please remember that everyone's allergies are different.  If you are unsure about any ingredients listed in these recipes please check with your doctor before introducing.

Tuesday, November 15, 2011

Baked Artichoke Dip

Baked Artichoke Dip with Rosemary Flatbread

I'm back from reaction-migraine land. I think... 

I've had a few surprise reactions lately and now have to add more foods to my list of danger foods - cauliflower and kale. I'm sad to see these foods go, but (fingers crossed) it is possible that I may be able to eat them again if all goes well with my BIE allergy treatment. I eat cauliflower and kale ALL the time - I suppose this could be one of the reasons that I developed allergies to them. I sometimes forget about eating a food in moderation because my diet often seems so limited, so I take what I can get. Losing these foods has made things a bit more difficult. I find that sometimes I finally learn how to cope with this allergy and then something like this turns my world upside down again. I'm getting better at bouncing back though - I'm learning about my own resilience. It's strange how food has such a hold on us, and even stranger how emotional it all can be. My plan now is to write down my list of safe foods and I hope that when I see that list I will feel a bit better about my food options. 

On a brighter note, this past weekend was a party for my nephew's second birthday. My sister asked me to make my Baked Artichoke Dip, because it's one of his favourites. I didn't get a photo this weekend, but the one below of the two of us is from the summer...you get the idea!


My nephew enjoying Baked Artichoke Dip and Roasted Zucchini and Garlic Dip

This dip is so quick and simple to prepare. It takes only a minute to throw together and then a little while to cook in the oven. Compared to conventional artichoke dip this dip has no dairy or eggs, but it is still full of flavour. I promise your guests will not even miss the dairy or eggs.


Baked Artichoke Dip

1 can of artichoke hearts or 4-5 artichoke hearts
1-2 cloves of garlic
1/4 cup/62.5 mls olive oil or oil of your choice
Salt and pepper to taste

Preheat oven to 400˚F/204˚C. In a food processor or blender place artichoke hearts, garlic and olive oil. Blend until smooth, adding more oil if necessary. Add salt and pepper to taste. Place in an oven-safe bowl and bake for 15-20 minutes or until edges start to bubble and brown slightly.

Serve hot, cold, or room temperature. This dip pairs perfectly with my Rosemary Flatbread, which cooks in about the same amount of time, at the same temperature. You could also serve it with crackers or veggies. This dip will keep in an air-tight container in the fridge for about a week.

 Notes:

-You can easily double this recipe but you may need to bake it for a few additional minutes. 

- If you are allergic to artichokes but can tolerate zucchini, try my Roasted Zucchini and Garlic Dip.

I linked this post to Cybele Pascal's Allergy Friendly Friday here and Allergy-Free Vintage Cookery's Lunchbox Love here. Check out the other great recipes!

*Please Note* These recipes are part of my personal allergy diet. Please remember that everyone's allergies are different.  If you are unsure about any ingredients listed in these recipes please check with your doctor before introducing.

Wednesday, November 02, 2011

Onion Soup

This post comes to you from the land of migraine fog. Sorry in advance if there are any sections that make absolutely no sense what-so-ever. I have a migraine because about 48 hours ago I tried a buttercup squash for the first time and ended up having an allergic reaction. I thought this strange since I have regularly been eating Golden Hubbard, Butternut and Pumpkin. My generally unpredictable health has a new sliver of predictability. If I have an allergic reaction, I have a migraine 48 hours later. If it was a bad reaction, I will also have a migraine 72 hours later. If I can find one little piece of this allergy puzzle to appreciate it is that my migraines are like clockwork. I suppose that's helpful in a sense, but excuse me if I don't jump for joy!

You may ask "why are you posting when you have a migraine?". Because I'm stubborn and sick of my health dictating things. Not this time, migraine. This time I win.  

Migraine, make way for my Onion Soup! 

I try to make my meals as affordable as I can, especially because many allergy-friendly foods are quite expensive (like specialty flours and pastas). Because of this I am trying to save where I can and one of my idea is to have at least one soup night a week. We have declared onions a food-group in our house. We cook with them every day. I suppose that's an uplifting part of my allergies - I can still eat onions! Let's hope that doesn't change! The caramelization of onions for this soup is a bit time consuming but I promise you, it is well worth it. While cooking, the onions will scent your house like you have never imagined. It will make your stomach growl with hunger.

Onion Soup
 
Serve this soup as a starter, or as a main meal with flat bread, crackers or try my Sweet Potato Fritters.


5-6lbs / 2.3-2.7kgs of onions
4 tbsps olive oil
6-8 cups / 1500-2000 mls of stock (chicken, beef or veggie)
Salt and pepper to taste

Try to slice onions no more than 5mm/0.19in thick - the thinner they are sliced, the quicker they caramelize. Place onions and oil in a large, wide-bottomed pot. On medium heat, bring your onions to a simmer, stirring occasionally. As the onions cook and begin to brown you will have to stir them more often so make sure to keep an eye on them. If you notice them starting to burn then turn down your heat. De-glaze your pan every once-in-a-while and make sure to scrape off the caramelization from the bottom of your pan. It will take about an hour to an hour and twenty minutes for your onions to caramelize. You want to look for a deep caramel colour. Once caramelized add your stock, salt, and pepper. Heat and serve!


I added this post to Cybele Pascal's Allergy-Friendly Friday here. Check out the other amazing recipes!

Notes:

- If you are in a hurry but still want onion soup then try separating your onions amongst multiple pots/pans. They will cook faster this way. - I often sneak a few spoonfuls of caramelized onions to put on my husband's sandwiches. They are also delicious on a burger!

- You can always caramelize the onions in advance and store them in the fridge to use later. Or make a double-batch so that you have extra for a rainy day. I'm going to try canning some so that I will have them on hand.

Additions:

- If you have bread that you can eat, toast some and add it to the top of your soup.

- If you can have cheese (dairy or non-dairy) add this too!

Thursday, October 20, 2011

Lemon Cake


I seem to not be able to post as often as I'd like. Time gets away from me when I'm not feeling well. I haven't had any serious reactions lately, but I have been going through a holistic allergy treatment called BIE since August and have had several "healing crises". In short, I keep feeling like I have a flu, I'm completely exhausted, or I have migraines. It is pretty miserable, but I have to keep reminding myself that this will lead to a healthier, happier existence. Eventually. I was sceptical at first, and am not sure how much this will change my anaphylactic reactions but so far I am seeing results - I went a whole month without a single headache, which is big for me! My doctor has also been working on my moods, so I'm feeling more like my old self again :) Needless to say, I wish I could blog non-stop but until my good health is more consistent I will have to take what I can get.

Now, to my actual recipe! This past weekend was a special birthday for my father-in-law. I won't tell you which milestone but I will say that he asked us to wear black - we were to mourn his youth. We didn't abide. Because I have airborne food allergies, certain foods are restricted for the whole household. I hate affecting other people's lives like this, especially because my in-laws have welcomed us into their home. I feel especially guilty on special occasions, but I try my best to provide delicious allergy-friendly food. For dinner my husband and I made beef short ribs (recipe coming eventually), Roasted Cauliflower, Cumin-Spiced Lentils, and my new adaptation of a blooming onion (recipe also to come). It was a delicious dinner. This special occasion called for something other than my go-to Vanilla Layer Cake, and after requests from my husband, I decided to try my hand at a lemon cake. This cake is based upon my vanilla cake, but I added some special lemon flavours to it. To top it all off I made a lemon curd that I swirled into the icing. I was in lemon heaven. I probably could have sat there all night, cake in one hand, a fork in the other....you get the picture. I hope you enjoy this cake as much as we did!

If you happen to have a pastry recipe, or can eat store-bought pastry, this lemon curd would make excellent lemon pies/tarts. My pastry recipe is pretty much non-existent, but I'll get there eventually.

I posted this recipe here for Allergy Friendly Friday. Check out the other recipes!


Lemon Cake

Compared to a conventional cake, this cake is free of gluten, wheat, eggs and dairy, and also does not have baking powder that generally includes corn or potato starch. This cake is also vegan.

1 1/2 cups/375 mls sorghum flour
1 cup/250 mls chickpea flour or white bean flour
1 cup/250 mls tapioca starch or white rice starch
2 tsps baking soda
1/2 tsp cream of tartar
1/2 tsp salt
1 cup/250 mls sugar

2 cups/500 mls rice milk
2 tsps lemon juice
2/3 cup/157 mls sunflower oil
2 tsps vanilla extract
Zest of two lemons

Preheat oven to 350˚F/176˚C.

If baking a cake, grease two 9''/23cm pans, line bottom and sides of pan with parchment, grease parchment.

If baking cupcakes, line cupcake pans with liners.

In a small bowl mix rice milk and lemon juice and set aside. In a large bowl sift together dry ingredients. Add oil and vanilla to rice milk/lemon juice mixture. Add wet ingredients to dry and whisk just until combined.
If baking a cake, divide batter into cake pans and bake at 350˚F/176˚C for about 28-34 minutes, or until cake tester or toothpick comes out clean. Cool on racks in pans for about 10 minutes, then run a knife around the edge and invert onto a rack to cool completely.

If baking cupcakes, divide cupcake batter evenly into cupcake pans, you should have 24 cupcakes. Bake at 350˚F/176˚C for 16-20 minutes, or until cake tester or toothpick comes out clean. Cool on racks for a few minutes in the pan, remove cupcakes and cool completely on rack.

Ice with Vegan Lemon Buttercream icing, swirled with Lemon Curd (recipes below) or icing of your choice.


Vegan Lemon Buttercream Icing 

Compared to conventional icing this is free of dairy and corn starch, generally found in icing sugar.

1 1/2 cups/375 mls vegan butter (I prefer Earth Balance Soy-Free Buttery Flavoured Spread)
5 cups/1250 mls organic icing sugar (I prefer Wholesome Sweeteners Organic Icing Sugar)
2 tsps lemon juice
Zest of one lemon
About 1/2 tsp salt, or to taste


In a medium bowl, cream vegan butter. Gradually work in sifted icing sugar. Add lemon juice and salt. Swirl with Lemon Curd and ice cake/cupcakes once cooled.

Lemon Curd

Compared to conventional lemon curd this is free of eggs and dairy. This recipe was altered from the Lemon Curd found here.

1/2 cup/125 mls lemon juice
1/4 cup/57 mls water
1/2 cup/125 mls sugar
4 Tbsps white rice flour
Zest of 2 lemons
3 Tbsps rice milk
1 Tbsp vegan butter

In a small saucepan whisk together lemon juice, water, sugar, white rice flour, and lemon zest. Bring to a boil on medium heat, whisking constantly to avoid lumps. Remove from heat and whisk in rice milk and vegan butter. Cool to room temperature refrigerate for 8 hours, overnight, or until desired consistency is achieved.

Troubleshooting:

- Even though I suggest using a sieve for the cake you may notice a few small lumps in your batter. These should dissipate during baking. Do not over-work your batter, as it will make your cake/cupcakes fall during baking.

- FYI, leave enough time for the Lemon Curd to set. I did not make mine far enough in advance so my icing was a little runny. It was still delicious, but a little messy!

-When purchasing icing sugar, be careful to read the label and double-check for potential allergens. Conventional icing sugar generally contains cornstarch. I noticed on Wholesome Sweeteners website that their icing sugar (sometimes labelled "powdered sugar" instead) can include cornstarch or tapioca starch.

Alterations:

- If you are allergic to chickpeas, as I have just found out I am, try using white bean flour in its place. I find that white bean flour gives a finer crumb, and is a closer taste/texture to wheat flour. Some people who are allergic to peanuts also have a legume allergy. If you suspect this, talk to your doctor before introducing. If you know you are allergic to legumes, or the other flours listed, try substituting your own favourite flour blend or ask me to try one for you.

- If you are allergic to sugar, or you are just avoiding it, substitute your sweetener of preference. For the cake I have used part sugar, part maple syrup before with decent results. Keep in mind that if your sweetener is in liquid form, you may want to reduce the rice milk in the recipes.

- You may substitute any other milk for the rice milk. For the cake you could also try replacing the milk/lemon juice combination for plain yogourt, but you will loose the extra lemony taste.

- I use sunflower oil in this recipe, but feel free to substitute your oil of preference.

- For the icing, if you are allergic to corn and tapioca, you may try making your own powdered sugar in your blender or food processor. You could also try adding a touch of white rice flour or other starch if your icing requires more stability. 

Monday, October 10, 2011

Golden Hubbard Squash Soup

Golden Hubbard Squash Soup
This past week was Latex Allergy Awareness week. I guess it shows how new to this allergy I am, because I had no idea! Next year I will try to post something special. 

Seems like I have to get my act together because I have also missed out on posting something for Canadian Thanksgiving, which was this weekend. Perhaps you could make stock from your turkey and use it for this soup?
 
It was pretty cold here about a week ago, but this weekend has been incredibly warm. Last week we harvested sunflowers and squash from the garden. A few of the squash have a touch of frost so we'll have to eat them up sooner rather than later - I'm sure that won't be difficult!

We have been eating our squash for about a month already and have nearly finished all of the Golden Hubbard squash that I planted. This is the first year that I've grown this variety and I look forward to growing it next year too! If you are lucky enough to have access to Golden Hubbard squash, jump on it. They can grow quite huge - I think our largest was nearing 18 lbs - but do not be intimidated by their size! They are so delicious. A word to the wise, you will need a strong, very sharp knife, and perhaps a hand at cutting into them.

Once they are cooked, their flesh is soft and delicate with a nice starchy feel to it. I am allergic to potatoes and I was so pleased to discover that the texture of Golden Hubbard squash is similar to potato, especially when mashed or when it is cooked into a soup.

I have been looking for this soup for the majority of my life. When I was about 4 or 5 years old my family and I went for vacation to Union Island, in St. Vincent and the Grenadines. The hotel where we stayed made this amazing pumpkin soup. I can still imagine the taste and have been trying to re-create it for YEARS. This soup is the closest I have ever come. It has a buttery flavour and texture from the squash, with a hit of heat from the ginger. It will warm you up on the dampest of fall days. I hope you love it as much as we do!

I shared this recipe on cybelpascal.com for Allergy Friendly Friday. Check out the other recipes that were posted there!

Golden Hubbard Squash Soup with Sweet Potato Fritters

Golden Hubbard Squash Soup

One medium onion
4 tbsps olive oil, or oil of your choice
2-4 thumbs/1.5-4 tbsps of ginger root, or to taste.
1 tbsp ground cumin
1 tbsp ground coriander
2 tsps ground turmeric
About 10 cups of stock - chicken or veggie
5-8 cups of roasted squash
Juice of one lemon
3/4 cup rice, coconut or other milk of your choice
1-3 tbsps honey, or to taste
Salt and pepper to taste


To Roast the Squash: 

Preheat oven to 425. Cut it in half, scoop out the seeds (save for roasting - they are delicious!) and place cut-side down on a baking sheet covered in parchment. Roast until tender, approx 30-40 mins for small squash and 60-70 mins for large.  

For the Soup:

Dice the onion and in a large pot, saute in oil until translucent, about 10 mins. Reduce the heat to medium-low. Mince or puree ginger root and add to onions, along with the ground spices. Stir for a few minutes so that spices cook a bit - watch carefully so that your spices do not burn. Add your stock and make sure to rub the bottom of the pot to remove any stuck-on spices. Slightly mash your roasted squash and add to the pot. Simmer for a few minutes. If you find you have some large pieces of squash in the soup simply squish them against the side of pot. Add the lemon, milk, honey and salt and pepper to taste.
   
Notes:

- A medium to large Golden Hubbard should be sufficient for this soup, or you may want to use two small squash.

- This makes enough soup to serve about 6-8 people. Feel free to reduce the recipe, if you wish. I always make large amounts of soup and save the leftovers for the next few days or freeze for an easy meal. I find that this soup will keep in the fridge for about a week. A bonus to leftover soup is that it always tastes better than when it was freshly made!

Alterations:

- I prefer this soup to have small pieces of squash but if you wish you can puree the soup if you want a smoother texture.

- If you can tolerate it I suggest using coconut milk, I find that it gives the soup a creamier texture than rice milk.

- If you are allergic to onion or any of the spices simply omit them, or create your own spice blend.

- If you are allergic to squash you may want to try making this soup out of sweet potato. It will give you different results but I'm sure it will be equally as delicious.

- If you cannot find Golden Hubbard squash I would suggest using another Hubbard squash variety like Red or Green Hubbard or pie pumpkins (fresh or canned). I have read that some canned pumpkin is actually Golden Hubbard, so it should have a similar taste and texture.

- If you are allergic to lemon, omit it, but you may want to add just a touch of white wine or vinegar to give it a bit of acidity.

- If you are allergic to honey, omit it, but try to add a bit of sweetener to help balance out the flavours.

Friday, September 30, 2011

Roasted Balsamic Beets

In the spirit of fall, I am using the fresh produce that is available. The stores and markets here are full of it! The big sale that is happening at our closest grocery store is for huge 10 pound bags of onions, potatoes, and beets! My mom loves pickled beets, and that's about the only way we ate them when I was growing up. I was never a fan. (Sorry mom!) It wasn't until a year ago when my Naturopath told me how good they are for detoxing your liver that I tried to eat beets again. I usually roast them and just eat them plain with some salt and pepper. Not anymore! My recipe for Roasted Balsamic Beets has become a house favourite. Even my husband, who isn't fond of beets, enjoys them. Oh, and don't worry, my mom is a big fan of these too! Enjoy!


Roasted Balsamic Beets

These have a vinegar flavour to them, but because they are roasted, and the vinegar is balsamic, the flavour is more mellow and sweeter than pickled beets.

5 medium/medium-large beets, and their greens (optional, see note below) 
5 cloves of garlic
2 medium onions, in eight pieces
1 tbsp of herbes de provence
3 tbsps of olive oil, or oil of choice
1/2 cup balsamic vinegar
Salt and pepper

Preheat oven to 425 F/218 C. Scrub your beets to remove any sand or dirt. Slice beets in rounds, preferably no more than 2-3cm/0.8-1.2" thick. Dice garlic and slice onion into about eight wedges. Place sliced beets, garlic and onion in a wide roasting pan or casserole dish that has a lid. Add herbs, oil, vinegar, pinch of salt, and pepper. Roast with lid for about 30-45 minutes, or until beets are tender and vinegar has caramelized a bit.  Make sure you stir the beets every once-in-a-while during cooking so that all sides of the beets become covered by vinegar. Yields enough for 4-6 people.

Note:

- If you have beets available to you that still have their greens attached, you can add them, along with the stems, to the roasting pan. Just wash and dry them, and slice into smallish pieces.

Alterations:

- If you are allergic to onions or garlic, simply omit them from the recipe.

- If you are allergic to any of the herbs mentioned, try making your own combination of rosemary, marjoram, savory, basil, lavender, and sage, or make your own blend.

- If you are allergic to grapes or balsamic vinegar try substituting another vinegar. Balsamic vinegar is quite sweet and caramelizes - if you are using another vinegar, you may want to consider adding a small amount of sweetener like molasses or honey to achieve a similar result.

Troubleshooting:

- If your beets are tender but the vinegar has not caramelized as much as you would like, just cook them for a little longer. The beets should not dissintegrate until they are very overcooked.


Sunday, September 18, 2011

Sweet Potato Fritters

Sweet Potato Fritters with Golden Hubbard Squash Soup (Recipe coming soon!)
Because I cook everything myself I try to find ways to cut down on  kitchen time. I like to keep the preparation quick, and keep the ingredient list short. (This also helps to fit our food budget.) These Sweet Potato Fritters have seven ingredients in total - I know that sounds like a lot but that includes water, salt and pepper, and oil for frying. They take just minutes to put together and just a few more to cook. And they are delicious! They get my mind off the survival of food, and remind me of times past spent with great friends and delicious pub food.

These Sweet Potato Fritters were inspired by Ann Vanderhoof's recipe for Plantain Spiders in her book An Embarrassment of Mangoes. (Here is a website for her new book The Spice Necklace). I made Plantain Spiders once, and they are amazingly delicious. Since developing a banana allergy I cannot eat plantain anymore. I find that these Sweet Potato Fritters are a good substitute. We have eaten them as an appetizer, a snack, and also as a veggie side for dinner. They pair perfectly with a bowl of soup. I have to say that my father-in-law is a sweet potato hater and even he likes them. I hope you enjoy them too!

Sweet Potato Fritters


One small sweet potato (preferably organic*)
About 1-2 thumbs of ginger (1-3 tbsps) or to taste
3/4 cup of brown rice flour
3/4 cup water
Pepper
High-heat oil for frying (I use safflower oil)
Fine or medium-grind sea salt

With a large-holed grater, grate the sweet potato into a medium-sized bowl. Grate the ginger with a fine grater, or finely mince or puree, then add to sweet potato. Add rice flour and water to the bowl and mix - I find that my fingers work best in order to get the batter evenly distributed amongst the potato. Add pepper and mix in, do not add salt at this point. Add a few tablespoons of oil in a non-stick pan and heat to medium/medium-high but do not allow your oil to smoke. Carefully place batter by tablespoon into pan, quickly spread out the batter (I do this with the back of the spoon) so that it lays flat - this will help it crisp up nicely. Shallow-fry fritters in batches, but be careful to not crowd your pan or they will not fry as evenly or be as crispy. Fry until crispy and golden brown - you will know when to flip them when the outside edges start to brown. Drain on paper towel and sprinkle with sea salt before they cool. Makes about 25 fritters.

* I suggest that you try to find organic sweet potatoes. I try to buy organic when I can, but I am on a tight budget so I have to pick and choose which foods I purchase organic. I have found that some foods are incredibly improved upon if they have been grown organically and sweet potato is one of them. We even eat the skin of organic sweet potatoes, it will give you some extra fibre too!

I linked this post on Allergy Free Vintage Cooking here for Allergy Friendly Lunchbox Love. Check out the other recipes listed!

Troubleshooting:

- I would suggest trying one of your fritters at the beginning of cooking and adjusting your ginger amount, if necessary.

- If your fritters stick to your pan, you may not be using enough oil.


Alterations:

- If you are allergic to sweet potato try using regular potatoes or parsnips.

- If you are allergic to ginger, simply omit it from the recipe. They will still be delicious!

- If you are allergic to rice, try experimenting with a different flour. You may have to adjust the water amount accordingly.  I have also made the batter with chickpea flour.

*Updated Note: Do not use wheat flour for the batter - my sister tried these with regular white wheat flour and they did not work.

Tuesday, September 06, 2011

Barbecued Chicken with a Ginger Garlic Maple Sauce & My Perfect End-of-Summer Meal

I have the perfect meal for you for this time of year. It takes advantage of the warmish weather we still have by using a barbecue. It also takes advantage of the cauliflower that is now in season.

The drizzle of maple syrup was my husband's idea, I think he's been watching too much Master Chef!

We have been eating this meal frequently, probably once a week for a few weeks, and we're not sick of it yet! This meal perfectly pairs sweet, sticky, barbecued chicken, roasted cauliflower and cumin-spiced lentils. We took this meal for a picnic a little while ago, and finished it all off with cupcakes made from my Vanilla Layer Cake recipe.  I told my friends that I was going to post these recipes as a "Perfect End-Of-Summer Meal". They didn't think it was that catchy and tried to figure out a different title that would serve this meal justice. I think the best they came up with was "Fabulous Feast with Friends". Whatever you call this meal, I hope you enjoy it as much as our friends and family do!

Perfect End-of-Summer Meal:

Barbecued Chicken with a Ginger Garlic Maple Sauce
Roasted Cauliflower
Cumin-Spiced Lentils


I have posted these as separate entries, so scroll down for the rest of the meal or click on the links above.

Barbecued Chicken with a Ginger Garlic Maple Sauce 

 
For the Barbecue Sauce:

Three thumbs of ginger (3-4 tbsps)
6 cloves of garlic
1 cup maple syrup
1 tsp salt or to taste

Grate or finely mince the ginger and put in a small bowl. Put the garlic through a press or finely mince and add to ginger. Add maple syrup and salt. Mix well, to ensure the salt is dissolved.

Alterations for the Sauce:

- If you are allergic to ginger or garlic simply omit them from the recipe

- If you are allergic to maple syrup you may want to use another liquid sweetener like honey (thinned out with some water) or brown rice syrup. You could also try fruit like applesauce, or blended pineapple or peaches.


For the Chicken:

One small chicken, butterflied.
Salt and pepper
Safflower oil, or high-temperature oil of your choice

Preheat barbecue to 350°F/176.6°C . If you don't have a thermometer on your barbecue, heat the barbecue on medium for about 10 minutes then turn it down to low.

You can often purchase a chicken butterflied at your grocery store or ask your butcher to do it for you. I prefer to do it myself, it's easy and less expensive. Simply place the chicken breast-side up on a plate or cutting board. Feel for the breastbone, take a pair of strong scissors or kitchen shears and cut the chicken in half, along the breastbone, going as close to the bone as you can. Rinse the chicken under cold water to remove any bone shards.

* From what I see online most people butterfly their chicken by removing the backbone and breaking or removing the breastbone. I'm not sure why this is the preferred method, I wonder if it makes the cut easier/better to cook?  We have never had any problems with the chicken after cutting beside the breastbone, and it is always tender and juicy. I think that this way is much easier.

Pat your chicken dry with some paper towel. Season well with salt and pepper and rub with oil. Oil your grill to prevent sticking. Open chicken and place the inside of the chicken down, onto the grill of the barbecue.

Cook over low flames with lid closed for 15 minutes. Flip the chicken over (inside of chicken should now be facing up) and cook for another 15 minutes. Keep an eye on the barbecue to watch for flames.

After the second flip (inside is now down) generously brush on the sauce, making sure to get lots of the ginger. Flip every 10 minutes, brushing on the sauce at each turn, including the underside.

The entire cooking time will be about 1 hour or 1 hour 10 minutes. Check with a meat thermometer to make sure the internal temperature reaches 180°F/82°C. Serves 4.

Alterations for Chicken:
- If you are allergic to chicken try using this as a sauce on fish or other meats like beef or pork. If you eat soy I think it would be delicious as a marinade for firm tofu.

Troubleshooting For Barbecuing: (Written by my husband, in barbecue-language)

- If you are worried about the chicken drying out, you can occasionally squirt it with lemon juice, apple-cider vinegar. If you are allergic to both, use a vinegar of your choice, a juice with some acidity, or water.

- Watch for flames, especially in the first 30 minutes and when the breast side is down. Before you start this meal, you may want to take this opportunity to do a big clean of the barbecue, scraping out the bottom and cleaning the grill of residual stuck-on food and grease that the brush doesn't always get. A clean barbecue will keep the fat from pooling which causes big flames for a prolonged period. You may also try carefully moving the chicken to a different spot on the grill so that it does not sit over the same flames for too long.

- If you do not have a barbecue thermometer, be aware the flames will cause the temperature of the barbecue to spike. When you get a lot of flames, especially when flipping the chicken, you can leave the lid open for a few minutes to bring down the temperature. After about 45 minutes, when the fat has mostly dripped out, you can turn up the burners just a little bit as the temperature may have dropped slightly.


Alterations If You Do Not Have A Barbecue:

- This sauce is delicious on oven-roasted chicken as well!


Roasted Cauliflower


This Recipe is part of my Perfect End-of-Summer Meal if you like, check out the other dishes that go with this meal: Barbecued Chicken with a Ginger Garlic Maple Sauce and Cumin-Spiced Lentils.

I first got the idea of roasting cauliflower from Molly Weizenberg's book A Homemade Life. And thanks be to Molly! It has now become a staple veggie dish in our house. This is my version. A word to the wise, I am generally not a cauliflower lover but when it's roasted it is dangerously good. I have single-handedly eaten almost an entire head of roasted cauliflower, so you may want to cook extra if you are cooking for cauliflower-lovers.

One head of cauliflower
Olive oil or oil of your choice
Salt and pepper

Preheat oven to 425.

Remove stem and leaves. Place cauliflower with the florets facing upward. Cut in half, through the florets and stem. Place one half with cut side facing up. Cut in wedges, through the root. Try to not have any pieces more than 3 or 4 cms thick or they will not brown as nicely in the oven. Wash cauliflower and dry as well as possible. Place a sheet of parchment paper on a baking sheet. Toss cauliflower with plenty of oil and salt and pepper, place wedges (and any loose florets or teensy pieces) in a single layer on your parchment. Do not overload your pan because your cauliflower will steam and not roast. Roast on bottom rack of oven for 20 minutes, flip the pieces and roast for about another 5-10 minutes. Serves 4.

Alterations:

- If you are making this for the Perfect End of Summer Meal and you are allergic to cauliflower, try roasting another veggie like squash, parsnips or carrots. Or pair the chicken and lentils with a green salad.

Troubleshooting:

- If you find that your cauliflower is steaming instead of browning it was either too wet when it went into the oven or your pan is overcrowded. I often make two pans-full of cauliflower, either at the same time, or in batches. 

- At the 20 minute mark you may want to remove any little pieces of cauliflower from the pan. If you leave them in for too long they may burn.

Cumin-Spiced Lentils

This recipe is part of my Perfect End-of-Summer Meal, if you like, check out the other dishes that go with this meal: Barbecued Chicken with a Ginger Garlic Maple Sauce and Roasted Cauliflower.

I have adapted this recipe from the book Simply Vegan by Debra Wasserman.

One medium onion, diced
3-4 tbsps oil
2 tsps cumin
1 cup red lentils
1.5 cups water
salt and pepper to taste

Saute onion on medium/ medium-low heat until translucent - about 10-15 mins.  Reduce heat a bit, add cumin and lentils and saute for a minute or two. Stir frequently to prevent the spice from burning on the bottom of the pot - you may need to add more oil at this point to prevent the lentils and cumin from sticking. Add water, bring mixture to a boil. Cover and reduce heat to minimum. Cook until all water is absorbed, approximately 10 minutes. Season with salt and pepper. Serves 4.


Alterations:

- If you are allergic to onion simply omit from the recipe. You may want to experiment with other flavours like fresh ginger root.

- If you are allergic to cumin, try other spices like cardamom, fennel, or caraway, or create your own spice mix.

- If you are allergic to lentils but can tolerate other legumes try making spiced chickpeas or beans.

- If you are allergic to lentils and other legumes and but want something else to pair with my Perfect End-of-Summer Meal, try mashed potatoes or sweet potatoes.