Showing posts with label Dessert. Show all posts

Monday, July 01, 2013

Strawberry Shortcake


These past five years have been difficult, to say the least. I not only have had to learn to live with countless new food allergies, I have had debilitating migraines. When they first began I was getting multiple migraines a day. Since then I have changed many things in my life and gathered a team of professionals to help (a neurologist, a naturopath, a chiropractor, a holistic allergist) and in doing this, I've managed to reduce my migraines to 2-3/week.

I know this sounds silly...but recently I have been avoiding you on purpose. My health has drastically improved (HURRAH!) but I haven't wanted to jinx it.

At the end of March, I went to a new dentist because I had extreme jaw pain. She quickly told me that one of my wisdom teeth, which I had been told countless times would never come in, was pushing a molar out of my jaw. Gross. Painful. Yes. And yes.

She said she would have to remove my molar. It was a dumb tooth anyway. I didn't want it anymore. It had caused me so much grief already, with countless attempts to fill a cavity, and eventually a root canal (because my then-dentist didn't get my entire cavity from the get-go). So, my new dentist pulled my molar. Then something amazing happened. My. Migraines. Stopped.

They just stopped. I had a migraine the morning my tooth was pulled, and I haven't had one since. I've been resisting dreading writing about it because what if writing on this blog forever ruins my migraine-free streak? Well, that's just dumb. So, here I am. Finally, writing it for all the world to see. My. Migraines. Stopped.

There, I said it again.

I haven't just been avoiding you because I (foolishly) didn't want to jinx my good-fortune. I've been living my life! I've been gardening like mad and I can't wait to show you my masterpiece-of-food-growing. I've been getting healthier by exercising and making my body stronger. And, what I'm most excited about: I've been singing and getting my voice back into shape. And oh, how I've missed that part of my life. My life is suddenly full of possibilities that I thought had all but disappeared. So, Sheena. What shall we do now?

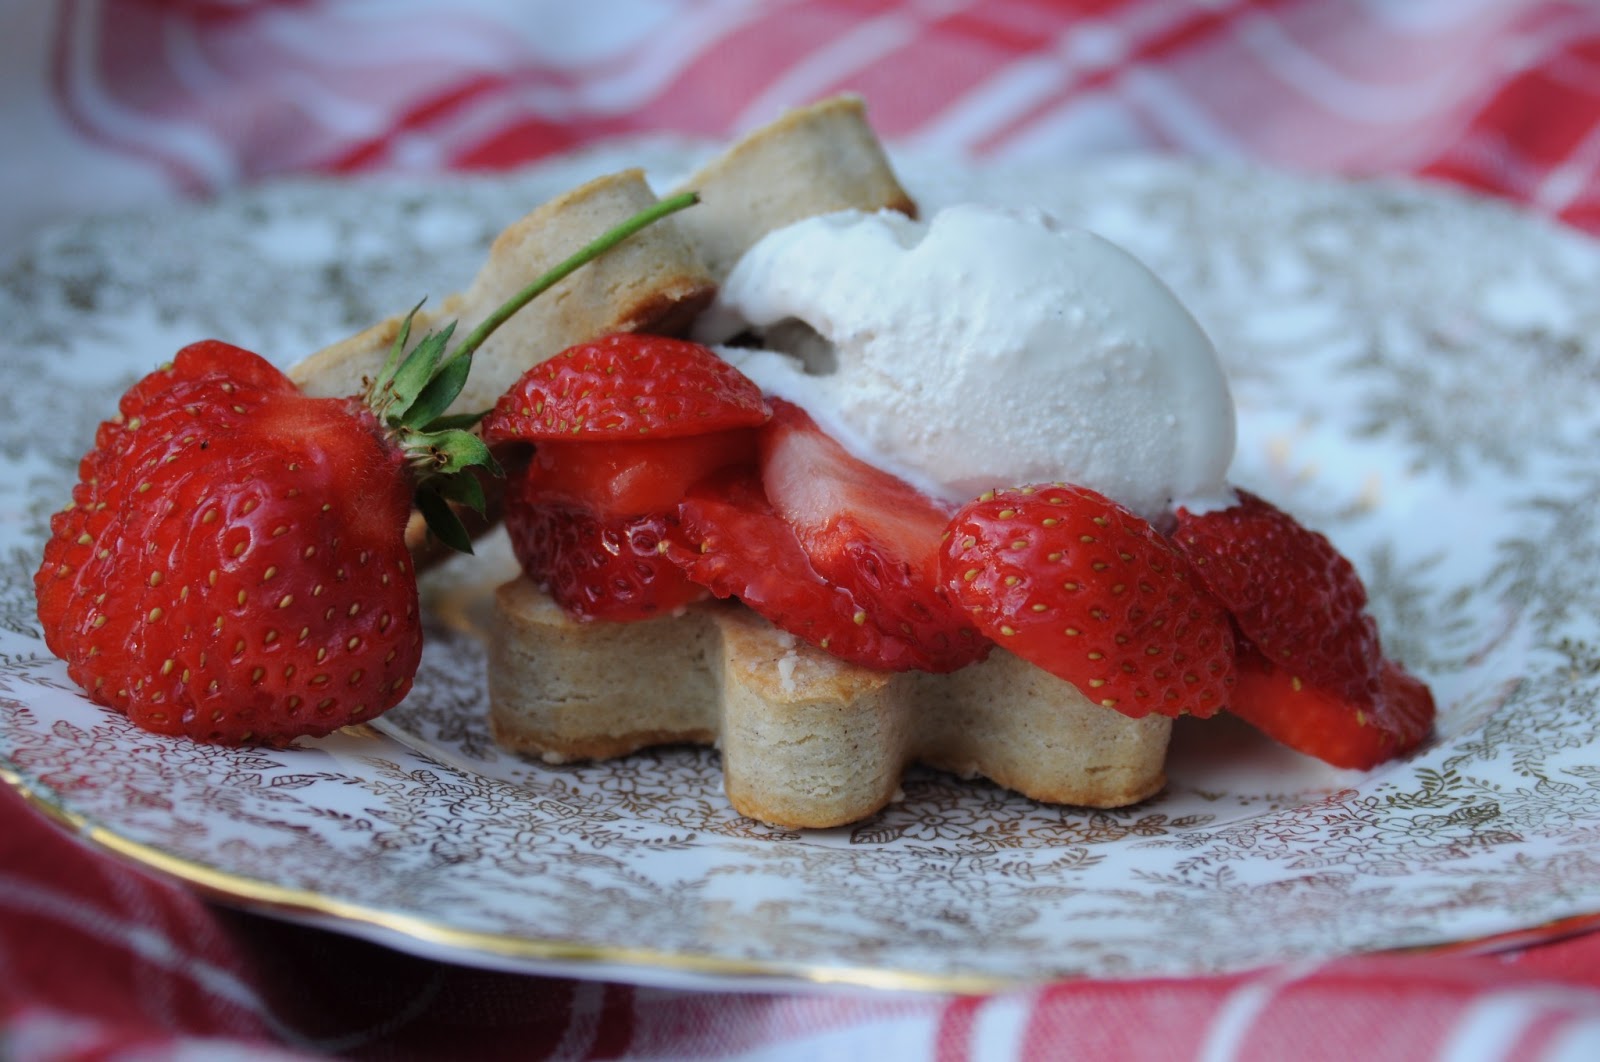
For today, I will celebrate Canada Day, and the summer bounty of strawberries, with this beautiful recipe for Strawberry Shortcake. This is a substantial shortcake, not sponge cake that is quite often seen posing as shortcake. They are actually my tea biscuit recipe and if you're not into strawberry shortcake they go splendidly with some butter/vegan butter and jam. Yum.

Happy Canada Day to my fellow Canadians around the world! Sorry I didn't post this sooner for you to make it this weekend. And happy (early) Independence Day to those of you in the US.


Make this dough ahead of time and let it rest in the fridge for an hour, or over night. They can also be cut into biscuits and frozen, then baked, but you will need to increase the time a minute or two or defrost them before baking. 

Strawberry Shortcake


Shortcake/Tea Biscuits


2 cups brown rice flour
2 cups sorghum flour
6 tbsps tapioca starch
1 1/2 tsps xantham gum
3 tsps baking powder*
1 tsp salt
1/2 cup vegan butter (I prefer Earth Balance Soy-Free Buttery Flavoured Spread) **
1/2 cup coconut oil **
1 1/4 cup milk***

Measure vegan butter and coconut oil. Freeze until firm. Mix dry ingredients. Add small chunks of firm vegan butter and coconut butter. Mix until crumbly, but you want some small chunks of butter and oil to still be visible. Slowly add milk and mix just until combined - if using a mixer wait just until dough starts to pull away from sides of bowl. Cover and refrigerate dough until chilled or overnight.

Preheat oven to 375°/190°. Remove dough from fridge and allow to warm up a bit so it's not too solid to work with - but you don't want it warm. Handle the dough as little as possible, to avoid a tough final result. Roll between two pieces of parchment or two silicone baking pads (If you do not have either of those items, you may want to use a bit of tapioca flour to prevent the dough from sticking. Try not to use too much.). Roll until about 2 1/2 - 3 cms / approximately 1 - 1.18" thick.  Dust the top of the dough with icing sugar (if you desire a sweet biscuit). Cut with desired cookie cutters. Dust underside with icing sugar. Line a baking sheet with parchment or a silicone baking mat. Bake for 20-25 minutes, depending on the size of your cookie cutters, or until cooked through and golden brown on the bottom.

If you prefer to make drop-biscuits add a bit more milk to your dough so it is more of a batter. Drop by spoonful onto your prepared sheet. Dust with icing sugar, bake following above directions.

To Make Shortcake

Slice or mash strawberries and arrange on top of a biscuit. Top strawberries with whipped cream, whipped coconut milk, ice cream, or non-dairy ice cream. Top with another biscuit. Or, instead of using two biscuits per dessert, you could slice the biscuits in half.

Coconut Whipped Cream

I have made coconut whipped cream before and it turned out great. But when I went to do it for this photo shoot it was an epic fail. Here is a great post from Oh Lady Cakes on Coconut Whipped Cream. It seems like she has it all figured out! I now know my whipped cream results were so drastically different because initially I used Thai Kitchen coconut milk, but this time it was an inexpensive kind that I realize was made with coconut extract and water. Gross. Because of this, my photos are with coconut ice cream.


 Alterations:

* If you are allergic to corn and cannot find a corn-free baking powder you can make your own. Just follow this ratio: 1 part baking soda, 1 part starch (like rice, arrowroot, or tapioca starch/flour), and 2 parts cream of tartar.

** While I prefer the ratio of half vegan butter/half coconut butter, you can use:

- 1 cup vegan butter, or
- 1 cup coconut oil, or
- 1 cup butter

*** Use any dairy or non-dairy milk. These are particularly excellent with a high-fat milk, such as coconut milk, or 3.5% dairy.


A Note on Strawberries And Allergies:

I have noticed in the past that I sometimes have a reaction from strawberries. I have pinpointed the problematic strawberries to ones that have been imported, either from the US or from Argentina. I seem to have no issue with local, Ontario strawberries. My holistic allergist told me that strawberries contain a high amount of histamine, the natural chemical produced in your body during an allergic reaction. When a fruit or vegetable ages, it produces more histamine. I thought this was perhaps the reason imported strawberries were not great for me - they have most-likely been picked long before I consume them. I recently learned something else about strawberries from a farmer at the local farmer's market. She said that many strawberry farms inject their berries with shrimp extract (GROSS!), which gives their berries a brighter colour. She told me that many kiwi farmers do this as well, and she has heard a lot of people who have shellfish and shrimp allergies (like me) have had issues with both of these fruits. 

I am not sure what it is about imported strawberries that affect me, so I will stick with the strawberry farms that I know I have no issue with. If you are concerned about your strawberry allergies talk your local farmer about their farm practices. Always make sure you speak to your doctor before introducing a potential allergen. 

*Please Note* These recipes are part of my personal allergy diet. Please remember that everyone's allergies are different.  If you are unsure about any ingredients listed in these recipes please check with your doctor before introducing. I am not a doctor, these stories are from my personal experiences.


Saturday, March 30, 2013

Carrot Cupcakes


I'm embarrassed that I've been away from this space for so long. Too long. Recently my friends have started to ask me if I am still blogging, because they have noticed my absence. I told them that I have indeed  wanted to, but I have been lacking inspiration. I'm glad to say that I feel the spark of inspiration yet again, so here I am! 

I've been spending my time wisely, mind you. During my hibernation, I've been developing and refining recipes that I will post shortly. I've also been seeing a chiropractor, doing exercises that he assigned, and eating healthier. My chiropractor has me walking every day, which drastically helps prevent my migraines. But because of the snow this winter, walking was a little difficult...until I discovered snowshoeing. I tried it for the first time this winter and fell in love. Even with the falling-down part, as you can see here:


But enough about winter. Let's welcome SPRING! And what better way to start this spring anew than with a delicious, healthy carrot cupcake recipe. I brought these cupcakes to my Mom's house for a big family dinner yesterday and everyone loved them. Personally, they are my favourite recipe I've created so far. As you can see, my nephew enjoyed them too :) 


I was browsing blogs for a delicious carrot cake recipe but had a difficult time finding one that met my allergy-restrictions. After a few attempts, I finally created my own recipe that fit my allergy-restrictions, and satisfied my healthy-side and my dessert-obsessed side. These cupcakes are free of all of the allergens I  avoid: dairy, fish, egg, gluten, peanuts, sesame, shellfish, soy, tree nuts, and wheat. They also happen to be vegan, sugar free (accept the icing), and packed with goodness from carrots, and apple sauce. I hope you enjoy them as much as my nephew and I do :)


Carrot Cupcakes


1 cup sorghum flour
3/4 cup brown rice flour
1 tsp xanthan gum
1 tbsp ground flax seed
1 tsp baking powder *if allergic to corn please see alteration below*
1 tsp baking soda
2 tsps cinnamon
3/4 tsp ginger
1/4 tsp allspice
1/2 tsp fine sea salt

2/3 cup agave nectar (or maple syrup)
1 1/3 cup unsweetened apple sauce
1/4 cup water or non-dairy milk
1/4 cup oil of your choice
1 teaspoon vanilla

1 1/2 cup shredded carrots

   
Preheat oven to 375°/190°. Line a cupcake tin with liners.

In a large bowl combine dry ingredients, set aside. Combine liquid ingredients in a small bowl. Add liquid ingredients to dry and mix just until combined. Fold in grated carrot.
   
Spoon into cupcake tin. Bake for 15-20 minutes, or until a cake tester or toothpick comes out clean. Cool in tin on racks for a few minutes, then remove from tin and cool completely before icing with my Vegan Buttercream (tastes like cream cheese icing!).


Yield 12 cupcakes

*note* I have not yet made this into a cake, but I am sure it would work out fine. I would suggest a 9"/23 cm round cake pan, lined with parchment, and bake it for about 20-30 minutes. Make sure to keep a careful eye on the cake after about 15 minutes just in case my guess is off. If you want to make a layered cake, you will have to double the recipe.


Alterations:

- If you are allergic to corn and cannot find a corn-free baking powder you can make your own. Just follow this ratio: 1 part baking soda, 1 part starch (like rice, arrowroot, or tapioca starch/flour), and 2 parts cream of tartar.

- If you are allergic to any of the flours listed try substituting your own gluten-free flour blend.

- If you are allergic to apples, try substituting another fruit puree.

-If you are allergic to any of the spices try experimenting with your own spice blend.

- If you are allergic to sugar, or you are sugar-free and cannot eat the icing recipe, these would be delicious as muffins with some dairy-free margarine like Earth Balance. Or try topping them with a cinnamon butter. Combine to taste: margarine, cinnamon, and maple or coconut sugar. 


Wednesday, October 03, 2012

Apple Spice Cake


I have been meaning to post this recipe for quite some time now but the photos I took aren't great. At the time the camera was running out of batteries, and I couldn't get my lighting right, so all my shots were blurry and dark. The ones I have here are the best that I managed to get and, believe me, they do not do this cake justice. I keep making this cake to take places, but then by the time it is finished I have to leave, and if there are any leftovers they do not last long enough for me to photograph....and I take almost all of the blame for that. Why don't I just bake a cake for myself and take photos? Because I can't put that kind of temptation in front of me! This is the kind of cake that I will eat for every meal until it is gone. What is wrong with me? Or rather, what is so right about this cake?

I recently took this cake to a summer BBQ where one of my friends said he could eat it all day. Even more recent, I took it to a party at another friend's house. My friend is Italian, and this party was full of her Italian family and other Italian friends. I figured it would be a tough crowd to convince that my gluten-free-vegan cake was actually good and they should try it out. But I didn't have to convince them at all. I have never, ever, received such wonderful and plentiful compliments for my cooking, and it made me blush.

The flavour of this cake is reminiscent of carrot cake, which I think is why it pairs so nicely with my Vegan Buttercream, which slightly resembles cream cheese icing. On the other hand, my husband is not a fan of carrot cake and yet loves this cake. It is an excellent cake for this time of year when you want to take advantage of apple season, but are looking for something different than a pie or a crisp.

It is Canadian Thanksgiving this weekend and I am going to make this cake for one, or more, of my celebrations. Perhaps then I can get a better photo. (That is, if there is time before it is all gobbled up!) I hope you can wow some of your family and friends with this cake. I promise you, not many people can tell that it is either gluten-free, or vegan. Maybe don't even tell them...


Apple Spice Cake

2 1/2  cups sorghum flour
1 1/2 cups brown rice flour
4 tbsps tapioca flour/starch
4 tsps baking soda
2 tsps cinnamon
1 tsp nutmeg
1/2 tsp allspice
1 tsp fine sea salt
1 tsp xantham gum

3 1/2 cups apple sauce
1 3/4 cups dark brown sugar
1/2 cup sunflower oil, or other light tasting oil

Preheat oven to 325° F / 167° C. Grease two 9" / 23 cm round cake pans, if your pans generally stick a little, you may want to line them with parchment paper as well.

In a medium bowl mix wet ingredients (including brown sugar), set aside. In a large bowl sift dry ingredients together. Add wet to dry and stir just until combined. Divide batter into pans, and bake on second-from-top rack for 38-45 minutes or until a cake tester or toothpick comes out clean. Let cool in in pans on a rack for about 15-20 minutes, then remove from pans and cool completely before icing.

Ice cake with my Vegan Buttercream icing and dust with ground cinnamon.

This can also be made into cupcakes, it will yield about 24. Bake at the same temperature for 20-25 minutes. I have not made these cupcakes in a while, so please keep an eye on them in case they end up cooking quicker than I have noted.

Please Note: This cake is gluten-free, free of all top allergens, and vegan. If you are baking for a vegan, check to see if they eat refined sugar because many do not, do to how it is processed. You can always look on packaging to see if something is certified vegan, or contact the company. I, personally, am not vegan, but am allergic to eggs (and until recently, dairy) which is why all of my baking is vegan, or close to it.


*Please Note* These recipes are part of my personal allergy diet. Please remember that everyone's allergies are different.  If you are unsure about any ingredients listed in these recipes please check with your doctor before introducing.

Wednesday, February 15, 2012

Candied Meyer Lemons


Because of my allergies I have not yet found a store-bought candy that I can eat. These Candied Meyer Lemons are a great alternative to store-bought candies, and have brought a little bit of joy into my life! If your allergies are anything like mine, I think you will appreciate these candies too. I was so pleased with how these turned out, even the first time that I made them. This is pretty much a fool-proof recipe. And although these candies take a bit of time to cook and set, they do not demand a lot of your attention or energy. I gave these Candied Meyer Lemons as Christmas gifts this year, and they were really well received. My grandparents told me they were just like English candied fruit, which they hadn't had in years! My mom loved them because they are just like the fruit gummies she is so fond of. And my sister has called them a "ray of sunshine on a cold winter day". Not bad, not bad at all!

I tried to find a candied lemon recipe online but the results were different than what I was looking for, so this is a combination of recipes that I have read, as well as some of my own ideas. The resources I read online are:

How to Make Candied Lemon Slices from ButterYum
Candied Lemon Slices from Ryan's Baking Blog
Dan Lepard's Candied Lemon Friands Recipe from The Guardian UK


Candied Meyer Lemons

Meyer Lemons (I generally use 6-8 lemons)
Water for boiling
Sugar syrup-1 part sugar, 2 parts water (for 6-8 lemons you will need about 4 cups of sugar, to 8 cups of water)

Slice the lemons into rounds, approximately 1 cm thick. Gently remove all seeds. In a large pot boil enough water that will cover the lemon slices. Once boiling, add lemons, boil for about 5 minutes and then drain (this removes any bitterness from the lemons). In the same pot make the sugar syrup. Make sure to combine enough sugar and water that will cover your lemons and allow them to float in the pot. Gently heat to dissolve the sugar. Add lemon slices and gently bring to a simmer. Turn down the heat to low, cook lemons in sugar syrup, barely simmering, for about 6 hours. Gently stir the lemons and syrup about every half-hour or hour. To check to see if they are done, pick the thickest slice and try to break through the peel with a wooden spoon (I do this against the side of the pot). 

Once the lemons are soft enough to break through the peel, you have three choices:

1) Drain them and make candies. 
2) Store them in a jar in their syrup to use as a spread on toast, or a topping on pancakes, ice cream, yogurt, or add it to mineral water or mixed drinks. (The syrup tastes similar to marmalade, which is great for me because I am allergic to orange, but can tolerate lemon.) 
3) Drain them and make candies, but reserve the syrup for a spread etc. 

If you are making candies, simply lay them onto a cooling rack over a cookie sheet (to catch any drips) and let set for a couple of days. You want them to be just slightly tacky to the touch, so be patient. Once set you can press them into sugar and then store them in a container, separating the layers with parchment paper. If you do not want them sugar-coated then they will still be OK, just a little sticky.

Notes:

- If you notice that the sugar syrup is dwindling, just add more syrup. You want to make sure the lemons are always floating in the syrup and not touching the bottom of your pot, so as not to stick and burn.

- It is normal for the syrup to darken as the cooking progresses, however, do not let the syrup burn.

- If the lemons are not cooked enough but you cannot monitor them for a while simply turn off the heat and allow them to sit in the syrup until you are available to cook them again. I have even let them sit overnight with success.

- Most vegans to not eat refined, white sugar, so if you want this recipe to be vegan you would have to use raw sugar instead.

Alterations:

- If you do not have access to Meyer lemons you can use regular lemons, however they will take much longer to cook because their rind is tougher and thicker, and they will not have as delicate a flavour as the Meyer lemons do. You may also want to experiment with other types of citrus, but the cooking time will differ depending on the thickness of the rind.

- I think that this recipe would work well with honey in place of sugar, although I have not tried it yet. Because honey is a humectant it will probably change the moisture of the candies, and they may need longer to set, or they may remain sticky indefinitely.

I shared this post with Allergy Friendly Friday. Check out the other great recipes there!

*Please Note* These recipes are part of my personal allergy diet. Please remember that everyone's allergies are different.  If you are unsure about any ingredients listed in these recipes please check with your doctor before introducing. 

Monday, January 30, 2012

Chocolate Peppermint Cake


Since I've missed the boat with most of my holiday recipes in the past, I've made a commitment to post something for Valentine's Day celebration before Valentine's Day. Actually, I'm cheating a bit...This is a recipe that I made a lot at Christmas time, but really it is suitable for a dessert any time of year. And it contains a lot of chocolate, so I figure it is especially suitable for Valentine's Day.

This has been voted by my family and friends as the best "Sheena Cucina" cake yet. I agree. This cake is so rich, fudgey, and moist, and although it is filling, it still often leaves you wanting more. To make this cake even more decadent I have created a chocolate-peppermint ganache to top it off. The cake itself is low in fat; most of its moisture comes from applesauce. You can serve the cake on its own, without the icing, it will still be delicious. However, I suggest that you indulge and serve the cake with this ganache.

This much-altered recipe was originally titled Peppermint Fudge Cake and it comes from Heather Van Vorous' book Eating For IBS. I have been making this cake for years directly from the recipe in this book. When I first realized that I had food allergies, I simply went without most of my old stand-by recipes. Because this cake is so delicious, I was determined to alter this recipe to suit my current diet, and yield a delicious cake. I have changed most of the ingredients and after many, many, many attempts I have finally perfected my version of this recipe. Enjoy!

Chocolate Peppermint Cake
1 1/2 cup sorghum flour
1/2 cup white bean flour
2 teaspoons baking soda
6 tablespoons cocoa powder (I prefer Navitas Naturals)
2 tbsps tapioca starch
3/4 cup sugar
1/2 teaspoon salt
1 cup semi-sweet chocolate chips (optional, but delicious) (I prefer Enjoy Life)

2 cups applesauce 
1/4 cup sunflower oil, or oil of your choice
1 tbsp pure vanilla extract
1 tbsp natural peppermint flavouring (I prefer Simply Organics)


Preheat oven to 325°/167°. In a large bowl, sift all dry ingredients together accept for chocolate chips. In a medium bowl combine wet ingredients. Add wet to dry and stir just until combined. Mix in chocolate chips. Pour into a greased non-stick bundt pan. Bake for approximately 55 minutes. Cool on wire rack for at least 15 minutes, then remove from pan. Alternatively you can bake this into cupcakes - bake for approximately 20-25 minutes. Serve cake/cupcakes warm or cold, topped with Chocolate Peppermint Ganache.


Chocolate Peppermint Ganache

1 cup semi-sweet chocolate chips
3 tbsps vegan butter
3 tbsps rice milk, or milk of your choice
1-2 tsps peppermint extract
A few pinches of salt, to taste

Combine chocolate chips and vegan butter in a saucepan or double-boiler. Melt over low/medium-low heat. Once melted, add rice milk and stir to combine. Remove from heat and add peppermint extract and salt to taste. Pour over cake and serve. 

 Alterations:

- If you are allergic to any of the flours mentioned above, you can use your favourite gluten-free flour blend. I have also made this cake with brown rice flour in place of the white bean. While this still made a delicious cake, it was very crumbly. If you chose to omit the bean flour, you may want to add in some xanthan gum (about 1 tsp) or a different gum to help bind the cake. If you do use a gum to bind, you would probably be able to omit the tapioca starch as well.

- If you are allergic to peppermint extract, simply omit it. You will still be left with a delicious chocolate cake. 

- If you are allergic to apples, try substituting applesauce for another fruit puree like plum or pear.  I do not suggest you use banana because the banana flavour will interfere with the chocolate and peppermint. 

- If you are serving this cake for Christmas, you may want to decorate it with some crushed-up candy canes. It looks so festive!

Oops, I forgot to mention this in my initial post: 

- If you are sugar-free try substituting the sugar in the cake for coconut sugar, date sugar, stevia, agave, or another sweetener of your choice. I have only made this with sugar, but I'm sure you would have comparable results. If your sweetener is in liquid form you may have to adjust the baking time slightly. If you are using something like stevia (which is way sweeter than sugar, and cannot be replaced cup-for-cup) use proper measurements to ensure that you do not over-sweeten the cake.

- If you are sugar-free make sure you buy unsweetened chocolate chips for the ganache, and add sweetener as needed.

Tips:

- If your bundt pan sticks a little, you may want to grease your pan and then dust it with cocoa powder to prevent your cake from sticking. 

- I searched for months to find a cocoa powder that was guaranteed gluten and wheat-free. As mentioned above, I used Navitas Naturals Cacao Powder (certified organic, kosher, gluten-free, vegan, and raw). You may also want to try Now Foods Organic Cocoa Powder (free of sugar, salt, starch, yeast, wheat, gluten, corn, soy, milk, egg, or preservatives) although I have not been able to purchase this anywhere in Canada.

I have linked this post to: Fat Tuesday, Slightly Indulgent Tuesday, Real Food Wednesday, Health 2day Wednesday, Allergy Friendly Friday. Check out the other great posts there!

*Please Note* These recipes are part of my personal allergy diet. Please remember that everyone's allergies are different.  If you are unsure about any ingredients listed in these recipes please check with your doctor before introducing.

Thursday, October 20, 2011

Lemon Cake


I seem to not be able to post as often as I'd like. Time gets away from me when I'm not feeling well. I haven't had any serious reactions lately, but I have been going through a holistic allergy treatment called BIE since August and have had several "healing crises". In short, I keep feeling like I have a flu, I'm completely exhausted, or I have migraines. It is pretty miserable, but I have to keep reminding myself that this will lead to a healthier, happier existence. Eventually. I was sceptical at first, and am not sure how much this will change my anaphylactic reactions but so far I am seeing results - I went a whole month without a single headache, which is big for me! My doctor has also been working on my moods, so I'm feeling more like my old self again :) Needless to say, I wish I could blog non-stop but until my good health is more consistent I will have to take what I can get.

Now, to my actual recipe! This past weekend was a special birthday for my father-in-law. I won't tell you which milestone but I will say that he asked us to wear black - we were to mourn his youth. We didn't abide. Because I have airborne food allergies, certain foods are restricted for the whole household. I hate affecting other people's lives like this, especially because my in-laws have welcomed us into their home. I feel especially guilty on special occasions, but I try my best to provide delicious allergy-friendly food. For dinner my husband and I made beef short ribs (recipe coming eventually), Roasted Cauliflower, Cumin-Spiced Lentils, and my new adaptation of a blooming onion (recipe also to come). It was a delicious dinner. This special occasion called for something other than my go-to Vanilla Layer Cake, and after requests from my husband, I decided to try my hand at a lemon cake. This cake is based upon my vanilla cake, but I added some special lemon flavours to it. To top it all off I made a lemon curd that I swirled into the icing. I was in lemon heaven. I probably could have sat there all night, cake in one hand, a fork in the other....you get the picture. I hope you enjoy this cake as much as we did!

If you happen to have a pastry recipe, or can eat store-bought pastry, this lemon curd would make excellent lemon pies/tarts. My pastry recipe is pretty much non-existent, but I'll get there eventually.

I posted this recipe here for Allergy Friendly Friday. Check out the other recipes!


Lemon Cake

Compared to a conventional cake, this cake is free of gluten, wheat, eggs and dairy, and also does not have baking powder that generally includes corn or potato starch. This cake is also vegan.

1 1/2 cups/375 mls sorghum flour
1 cup/250 mls chickpea flour or white bean flour
1 cup/250 mls tapioca starch or white rice starch
2 tsps baking soda
1/2 tsp cream of tartar
1/2 tsp salt
1 cup/250 mls sugar

2 cups/500 mls rice milk
2 tsps lemon juice
2/3 cup/157 mls sunflower oil
2 tsps vanilla extract
Zest of two lemons

Preheat oven to 350˚F/176˚C.

If baking a cake, grease two 9''/23cm pans, line bottom and sides of pan with parchment, grease parchment.

If baking cupcakes, line cupcake pans with liners.

In a small bowl mix rice milk and lemon juice and set aside. In a large bowl sift together dry ingredients. Add oil and vanilla to rice milk/lemon juice mixture. Add wet ingredients to dry and whisk just until combined.
If baking a cake, divide batter into cake pans and bake at 350˚F/176˚C for about 28-34 minutes, or until cake tester or toothpick comes out clean. Cool on racks in pans for about 10 minutes, then run a knife around the edge and invert onto a rack to cool completely.

If baking cupcakes, divide cupcake batter evenly into cupcake pans, you should have 24 cupcakes. Bake at 350˚F/176˚C for 16-20 minutes, or until cake tester or toothpick comes out clean. Cool on racks for a few minutes in the pan, remove cupcakes and cool completely on rack.

Ice with Vegan Lemon Buttercream icing, swirled with Lemon Curd (recipes below) or icing of your choice.


Vegan Lemon Buttercream Icing 

Compared to conventional icing this is free of dairy and corn starch, generally found in icing sugar.

1 1/2 cups/375 mls vegan butter (I prefer Earth Balance Soy-Free Buttery Flavoured Spread)
5 cups/1250 mls organic icing sugar (I prefer Wholesome Sweeteners Organic Icing Sugar)
2 tsps lemon juice
Zest of one lemon
About 1/2 tsp salt, or to taste


In a medium bowl, cream vegan butter. Gradually work in sifted icing sugar. Add lemon juice and salt. Swirl with Lemon Curd and ice cake/cupcakes once cooled.

Lemon Curd

Compared to conventional lemon curd this is free of eggs and dairy. This recipe was altered from the Lemon Curd found here.

1/2 cup/125 mls lemon juice
1/4 cup/57 mls water
1/2 cup/125 mls sugar
4 Tbsps white rice flour
Zest of 2 lemons
3 Tbsps rice milk
1 Tbsp vegan butter

In a small saucepan whisk together lemon juice, water, sugar, white rice flour, and lemon zest. Bring to a boil on medium heat, whisking constantly to avoid lumps. Remove from heat and whisk in rice milk and vegan butter. Cool to room temperature refrigerate for 8 hours, overnight, or until desired consistency is achieved.

Troubleshooting:

- Even though I suggest using a sieve for the cake you may notice a few small lumps in your batter. These should dissipate during baking. Do not over-work your batter, as it will make your cake/cupcakes fall during baking.

- FYI, leave enough time for the Lemon Curd to set. I did not make mine far enough in advance so my icing was a little runny. It was still delicious, but a little messy!

-When purchasing icing sugar, be careful to read the label and double-check for potential allergens. Conventional icing sugar generally contains cornstarch. I noticed on Wholesome Sweeteners website that their icing sugar (sometimes labelled "powdered sugar" instead) can include cornstarch or tapioca starch.

Alterations:

- If you are allergic to chickpeas, as I have just found out I am, try using white bean flour in its place. I find that white bean flour gives a finer crumb, and is a closer taste/texture to wheat flour. Some people who are allergic to peanuts also have a legume allergy. If you suspect this, talk to your doctor before introducing. If you know you are allergic to legumes, or the other flours listed, try substituting your own favourite flour blend or ask me to try one for you.

- If you are allergic to sugar, or you are just avoiding it, substitute your sweetener of preference. For the cake I have used part sugar, part maple syrup before with decent results. Keep in mind that if your sweetener is in liquid form, you may want to reduce the rice milk in the recipes.

- You may substitute any other milk for the rice milk. For the cake you could also try replacing the milk/lemon juice combination for plain yogourt, but you will loose the extra lemony taste.

- I use sunflower oil in this recipe, but feel free to substitute your oil of preference.

- For the icing, if you are allergic to corn and tapioca, you may try making your own powdered sugar in your blender or food processor. You could also try adding a touch of white rice flour or other starch if your icing requires more stability. 

Friday, August 26, 2011

Vanilla Layer Cake

The time is approaching. The time when every day we will have to wear layers and slipper socks....and dare I say it...jackets. No more flip-flops, or tank tops, or summer skirts.  I have found myself over the past couple of weeks being cold. I don't like that. I've had to open my sweater drawer and put one on. I have started to drink hot tea, instead of iced. Fall is almost here. Almost....not quite yet. But it's coming. I can feel something, and it feels like Fall.

I can see it too, in my garden. My sunflowers have started to bloom and my winter squash are thriving. I have just been able to harvest a ripe Golden Hubbard squash. I'm not about to complain about that part of this time of year. In fact, I love that part, but I'm trying to change my way of thinking about the rest of it.

I live for summer. L I V E. I love it. I feel like I come alive during summer. I wait all year long for it to appear. When I was a kid I used to like spring, but only really because I had a cute rain jacket, I liked to wear rubber boots, and my birthday is in April. Those reasons don't do it for me anymore. Spring is just a stepping stone for Summer. Ah...Summer!

One of the large parts of Fall that I dislike is that "back to school" feeling. Even though I'm not going to school right now, I still get it. I'm starting to think that this feeling never goes away. Just the other day, my mother-in-law said she had that feeling. There has to be something we can do to change that! The weird thing is that I like school, but that feeling is something all unto itself.

Over the past couple of years, my sadness over the "Death of Summer" - as I like to call it - has escalated. I end up mourning the loss of summer before it's even gone. By doing this I end up waisting the end of my precious summer, and for what? I've decided feeling that way is not worth it, so I've been trying to train my mind to feel positive about Fall. I'm starting to think of this time of year as not the "Death of Summer", or even the "End of Summer" but as the "Beginning of Fall".

I know, it's so obvious and it sounds simple, but a change like this would be monumental to my way of thinking. I've been compiling a mental list of all of my favourite things about fall, and most of them revolve around food. I love fall produce, and as luck has it, can eat quite a lot of it! I'm starting to look forward to harvesting the rest of the fall veggies from my garden, like parsnips, squash, and Jerusalem artichokes (otherwise known as sunchokes). I also can't wait for the show my sunflowers will put on - a sneak peek has already begun!

I assure you that I will get to posting fall recipes, but for now I am going to avoid it at all cost and try to just enjoy what Summer has left to offer.

Summer is, in a large part, about entertaining. So, in celebration of the last precious days of August, I give you my Vanilla Layer Cake. I remember the day when I successfully created this recipe and what a day it was! Cake, was yet again, a part of my life!

This cake is delicious, and no, I am not going to be modest about that. This is a fight-for-the-last-slice kind of cake. An excuse-to-drink-another-cup-of-tea cake. A cake-is-a-legitimate-breakfast-food cake. It has a taste that is a bit different from a conventional vanilla cake, which is made with butter, eggs and wheat.The taste of this cake is a teensy bit reminiscent of cornbread, but in a more delicious, cakier way. I have heard people on TV talk about how chickpea flour tastes too much like chickpeas, and because of this you can only put it with strong flavours like an immense amount of chocolate. I disagree. If you have the correct balance of ingredients in your recipe, you will not be able to recognize the chickpea flavour. You may have noticed this if you tried the Chocolate Chip Pancake recipe I posted a few weeks ago.

This cake is one of my big crowd-pleasers. It will satisfy your guests no matter what their dietary restrictions are. There is always a "wow" factor attached to a layer-cake and it can be the perfect addition to a celebratory meal. Speaking of "wow" factors, you may be wondering why I have not included a photo of the complete cake. I made this cake the other day when we had guests, and had intended to take photos of it in its entirety. I was in a hurry to assemble it, and I ended up breaking the top layer of the cake. It looked terrible, but I was assured by everyone at the table that the taste made up what the cake lacked in appearance.

I suggest that you layer this cake with my Vegan Buttercream Icing. I also make this recipe into cupcakes. You can ice them, or serve them with berries as a sort of short-cake. I will post photos of an entire cake and cupcakes the next time I bake them. In the meantime, the photos of this slice will have to do. I hope you are able to take advantage of these last few days of Summer. Enjoy your cake!


Vanilla Layer Cake

Compared to a conventional cake, this cake is free of gluten, wheat, eggs and dairy, and also does not have baking powder that generally includes corn or potato starch. This cake is also vegan.

1 1/2 cups/375 mls sorghum flour
1 cup/250 mls chickpea flour or white bean flour
1 cup/250 mls tapioca starch
2 tsps baking soda
1/2 tsp cream of tartar
1/2 tsp salt
1 cup/250 mls sugar


2 cups/500 mls rice milk
2 tsps apple cider vinegar
2/3 cup/157 mls sunflower oil
4 tsps vanilla extract

Preheat oven to 350˚F/176˚C.

If baking a cake, grease two 9''/23cm pans, line bottom and sides of pan with parchment, grease parchment.

If baking cupcakes, line cupcake pans with liners.

In a small bowl mix rice milk and apple cider vinegar and set aside. In a large bowl sift together dry ingredients. Add oil and vanilla to rice milk mixture. Add wet ingredients to dry and whisk just until combined.

If baking a cake, divide batter into cake pans and bake at 350˚F/176˚C for about 34-38 minutes, or until cake tester or toothpick comes out clean. Cool on racks in pans for about 10 minutes, then run a knife around the edge and invert onto a rack to cool completely.

If baking cupcakes, divide cupcake batter evenly into cupcake pans, you should have 24 cupcakes. Bake at 350˚F/176˚C for 18-22 minutes, or until cake tester or toothpick comes out clean. Cool on racks for a few minutes in the pan, remove cupcakes and cool completely on rack.

Ice with Vegan Buttercream icing (recipe below) or icing of your choice.

Yield, a two-layer cake or 24 cupcakes.

Vegan Buttercream Icing

1 1/2 cups/375 mls vegan butter (I prefer Earth Balance Soy-Free Buttery Flavoured Spread)
5 cups organic icing sugar (I prefer Wholesome Sweeteners Organic Icing Sugar)
2 tsps vanilla extract
About 1/2 tsp salt, or to taste

Makes enough icing to ice a two-layer cake or 24 cupcakes.

In a medium bowl, cream vegan butter. Gradually work in sifted icing sugar. Add vanilla and salt. Spread over cake or cupcakes once they have completely cooled.

Troubleshooting:

- Even though I suggest using a sieve you may notice a few small lumps in your batter. These should dissipate during baking. Do not over-work your batter, as it will make your cake/cupcakes fall during baking.

-When purchasing icing sugar, be careful to read the label and double-check for potential allergens. Conventional icing sugar generally contains cornstarch. I noticed on Wholesome Sweeteners website that their icing sugar (sometimes labelled "powdered sugar" instead) can include cornstarch or tapioca starch.

Alterations:

- If you are allergic to chickpeas, try using white bean flour in its place. I find that white bean flour gives a finer crumb, and is a closer taste/texture to wheat flour. Some people who are allergic to peanuts also have a legume allergy. If you suspect this, talk to your doctor before introducing. If you know you are allergic to legumes, or the other flours listed, try substituting your own favourite flour blend or ask me to try one for you.

- If you are allergic to sugar, or you are just avoiding it, substitute your sweetener of preference. I have used part sugar, part maple syrup before with decent results. Keep in mind that if your sweetener is in liquid form, you may want to reduce the rice milk in the recipe.

- You may substitute any other milk for the rice milk. You could also try replacing the milk/vinegar combination for plain yogourt.

- If you are allergic to apples or apple cider vinegar, you may substitute the apple cider vinegar for a vinegar of your choice. You may also substitute the vinegar for lemon juice.

- I use sunflower oil in this recipe, but feel free to substitute your oil of preference.


Thursday, July 21, 2011

Chocolate Chip Pancakes


 So, here it goes. I've been toying with the idea of starting a recipe blog for months now. My sister and my husband have told me countless times to "stop talking about it, just start"...but things keep getting in the way. I'm not feeling well, or I don't have perfect photos of my recipes, or I just don't feel ready... My husband says this is all part of the journey my "followers" will want to hear about. The thought of anyone being interested in what I have to say is strange and, I admit, more than a little scary. I read blogs like Orangette and Gluten-Free Goddess and get scared all over again because of their perfection. But I guess everyone has to start somewhere. I will probably never be as wonderful a blogger as they are, or have their kind of following, but I feel like I have important recipes to share. These recipes are important because without them I probably would have gone mad by now. I'm thankful that I can cook and adapt recipes to suit my dietary needs - which seem to be getting more and more strict.

I have a love/hate relationship with food. It is my friend and my enemy. My saviour and my destroyer. I'm new to anaphylactic food allergies and I'm trying to deal with the emotions that go along with them. My allergies seem to have taken a hold of my life and turned it upside down. This all started three years ago, if not earlier. Chronic, debilitating migraines kept me from continuing at my job. I was treated by a neurologist and medication helped a little. It was not until I started seeing a naturopathic doctor, who put me on an extensive elimination diet, that I was able to live migraine-free for a while. Food was obviously the culprit, but only re-introducing foods would indicate what the cause was. I found out the hard way and ended up having anaphylactic reactions when I re-introduced banana, then wheat, egg and shrimp. It turns out that my reactions to many foods are much more dangerous than just migraines. When I first started having anaphylactic reactions I was scared every time I ate. During the many hours spent at hospitals I have heard countless stories from nurses about their children or husbands who have anaphylactic allergies. They would always assure me that it would get easier and that the beginning of it is the most difficult part. I have to tell myself that once in a while because this is all still new to me, even considering the progress I have made. With perseverance I have gradually tested the waters and found enough friendly food to have a healthy diet. I still plan to re-introduce more foods so here's hoping that my diet will be able to grow, even just a little.

If you think that you have allergies you should talk to your doctor, especially before trying a new diet.  Let me be clear, I am not an expert on allergies. But, I do know how to live on an allergy-restricted diet and be STARVING for good food. I have an unwritten rule that I only eat delicious food. Of course, when I'm starving and I don't have time or ingredients or energy to make something, I will eat raw carrots or a bowl of rice with beans from a can, but I try not to make a habit of this. I love food and cooking and it was really a no-brainer when I began my brown-rice cleanse diet a little over a year ago that I would just make up new recipes. I have failed countless times when trying to bake something without gluten, dairy, eggs and nuts and I have cried in the grocery store after reading label and realizing that there isn't A N Y T H I N G  I can eat.

So, after my husband picks my spirits up again (he's had a lot of practice) and reminds me of the things that I CAN eat, I go home and spend some quality time in the kitchen.
One of my favourite pick-me-up meals are my Chocolate Chip Pancakes, so I thought I'd start my blog with this recipe. They are filling, quick, and easy and require just a handful of ingredients - something I appreciate from living on a budget and eating allergy-free. They are also good chocolate-free, slathered with vegan butter (I use Earth Balance Soy-Free Buttery Flavoured Spread) and maple syrup - but I prefer the chocolate ones. I eat them hot out of the pan, or as left-overs at room temperature. They also freeze well (I put sheets of parchment in between so they come apart easily) and can be popped in the toaster or oven at 350 for just a minute. They make a great meal or snack at any time of day - I prefer them for dessert. 

Enjoy!


Chocolate Chip Pancakes

Compared to conventional pancakes, these pancakes have no wheat, gluten, dairy, eggs or corn. They are also vegan.

1 cup chickpea flour
1 cup sorghum flour
3 tbsp flax seed
1/2 tsp fine sea salt
2 cups of rice milk
3 tbsp sunflower oil or light-tasting oil of your choice
1/2 - 1 cup of chocolate chips (optional) (I generally use 3/4 cup of Enjoy Life chocolate chips)

In a medium bowl sift flour and whisk dry ingredients together. Pour in 2 cups of rice milk and the oil and whisk to combine. Allow your batter to sit for a few minutes and the flax will cause it to thicken. Heat an oiled, non-stick frying pan to medium / medium-high heat but do not allow your oil to smoke. Drop by 1/8 - 1/4 cupfuls, depending on what sized pancakes you prefer. Watch carefully - they cook quickly! Turn the pancakes once you notice that they have slightly browned edges and several bubbles appear.  Re-oil the pan in between batches of pancakes to prevent them from sticking. Makes approximately 12 medium-sized pancakes.

Possible Alterations:

- Because I may be allergic to corn, and I'm definitely allergic to potato I do not use baking powder, not even the gluten-free variety. I have made my own before but have not yet achieved the perfect taste - I can always taste the baking soda too much. Because of this, these pancakes do not rise very much. I'm not a fan of the diner fluff "pancakes" but much prefer them to be substantial with an eggy texture. Funny enough, these also have no eggs, but the flax makes up for that. If you try these and are not pleased with their density then please feel free to add some baking powder, if your diet allows.

- If you are allergic to chickpeas you may substitute the chickpea flour for white bean flour instead. Be careful because they can easily stick to the pan with this flour so make sure you use a generous amount of oil in your pan.

- Rice milk is fairly sweet so if you are using a different kind of milk you may want to adjust the salt content accordingly. Do NOT do this by tasting the raw batter because it is gross and will give you no indication of what the final product will taste like. If I'm unsure of my salt measurement I like to make a mini pancake as a tester and then make adjustments to the rest of the batter accordingly.

Troubleshooting:

- If your pancakes stick to the pan, either: your pan is not hot enough, there is not enough oil in the pan, your batter is too runny, or you're trying to flip them too soon. If it's your batter, let it sit for a minute and it may thicken-up because of the flax. If this does not happen, add more flax 1/2 tsp at a time, waiting for a minute after each addition so that you do not add too much.

- As the batter sits, it will continue to thicken. If it seems too thick, add a little more rice milk.